How to use Gmail to send as Email Forwarding
Nowadays, email is cheap, or literally free as you can immediately sign up an account with Gmail or Outlook. However, there are times when you want to use your own domain especially if you happen to run a small or home business. Here’s how you can setup your Gmail Send As function so that you can use your existing Gmail to receive and send as your business email.
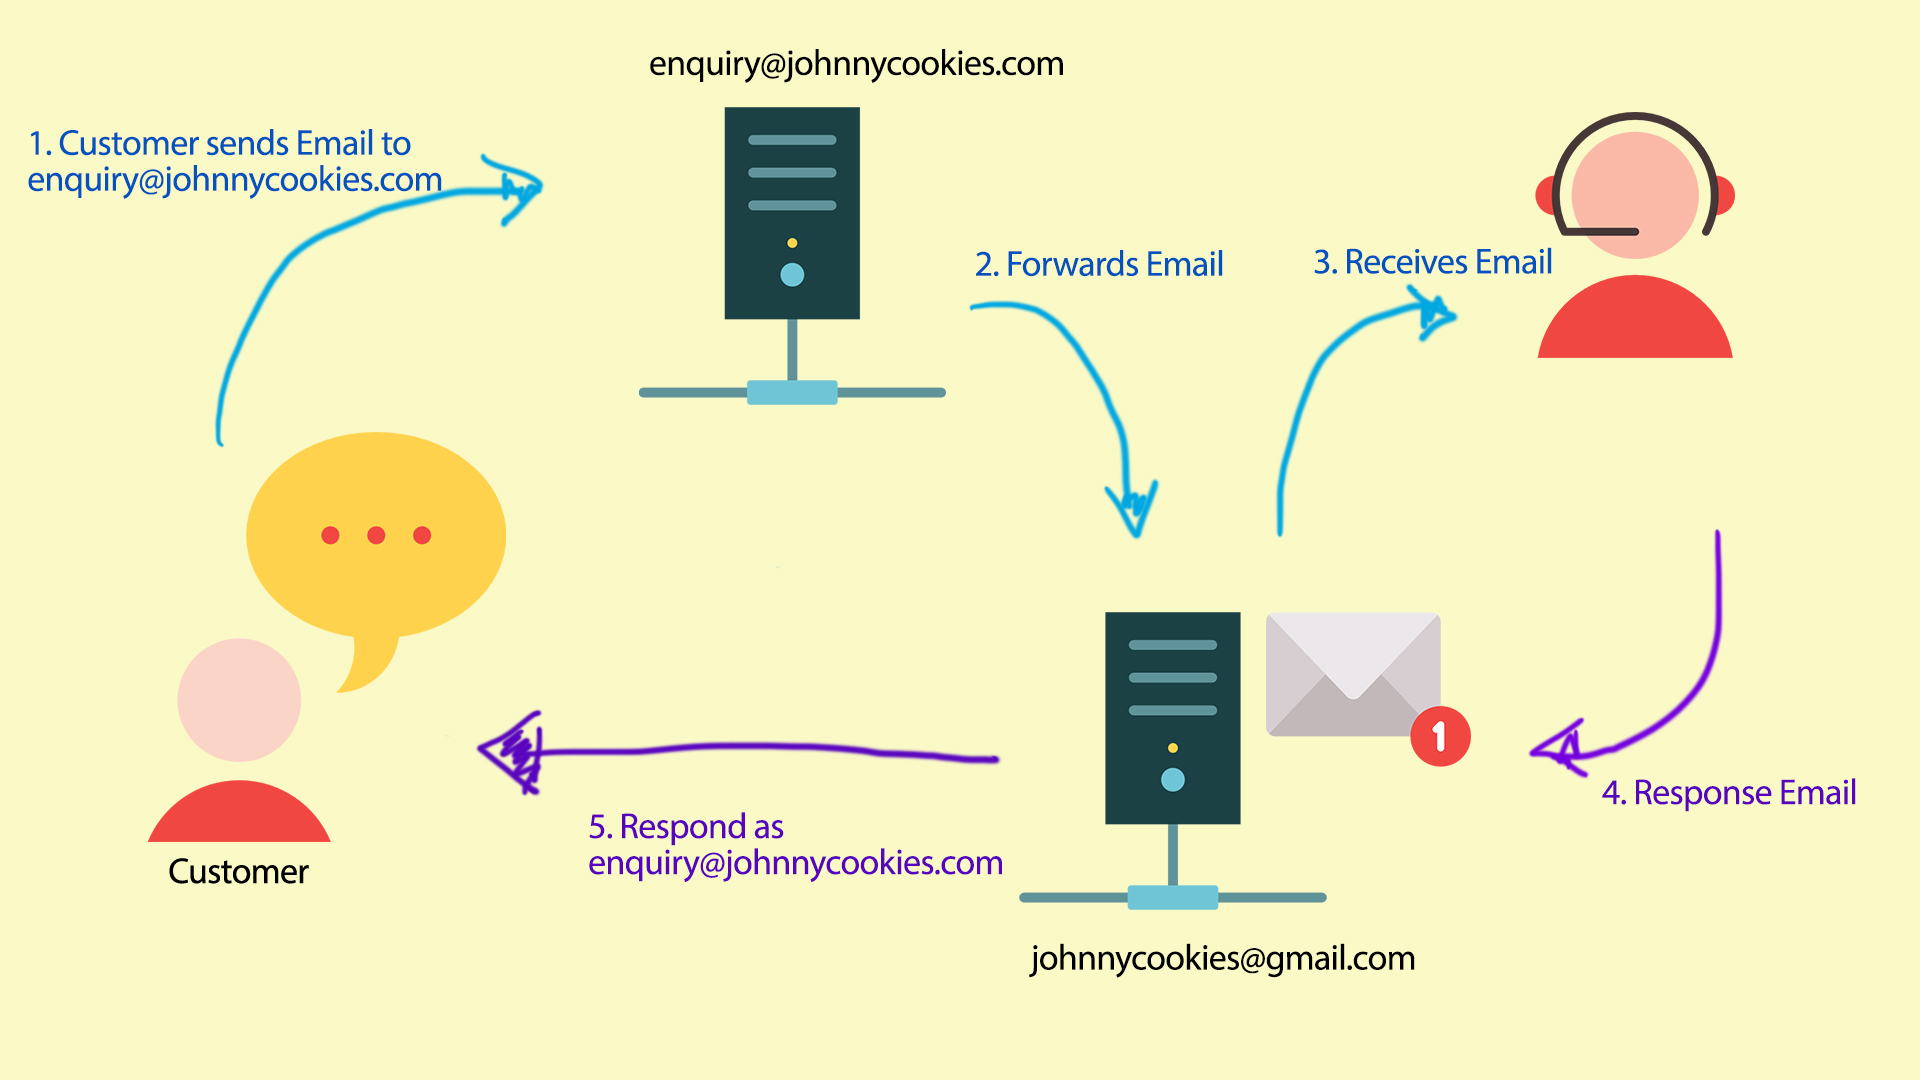
No joke, the above sketching is something that my client asked me because their hosting provider only comes with 10 email addresses but with unlimited email forwarding email addresses.
Let’s take an example, say if I run a home business of baking cookies, I could have registered “[email protected]” and off to start baking in my kitchen. That might work in certain cases, but what if I want to present my business in a more professional way? Or if I want to properly utilise the domain name I currently own?
So my business grew, then I purchased the domain “johnnycookies.com” and got my own site up and running. I wanted to set up a proper enquiry email – “[email protected]”. Sometimes your hosting company would include an email plan depending on which provider and package you’ve signed up. Most of the time, their email system is a pure disaster with limited bandwidth and storage. Why don’t we use Gmail which is a better choice?
Step 1: Setup Email Forwarding
You probably need to check with your email service provider on how to set up the email forwarding. I will be using GoDaddy in my example.
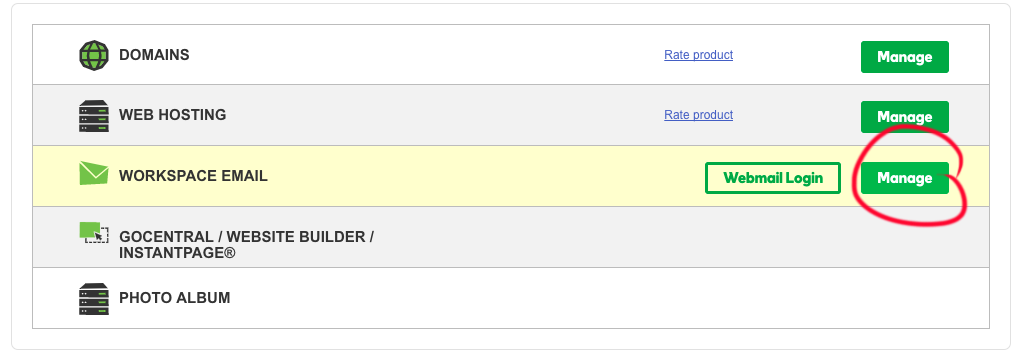
1a: Login to your GoDaddy account, Click “Manage” at the Workspace Email item.
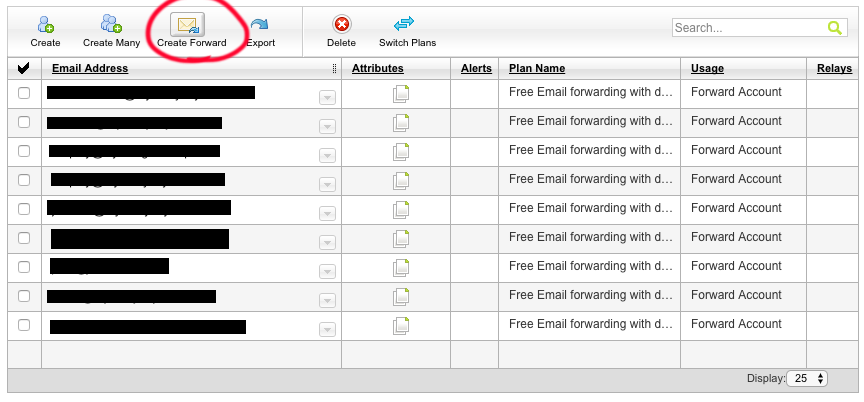
1b: Click “Create Forward”
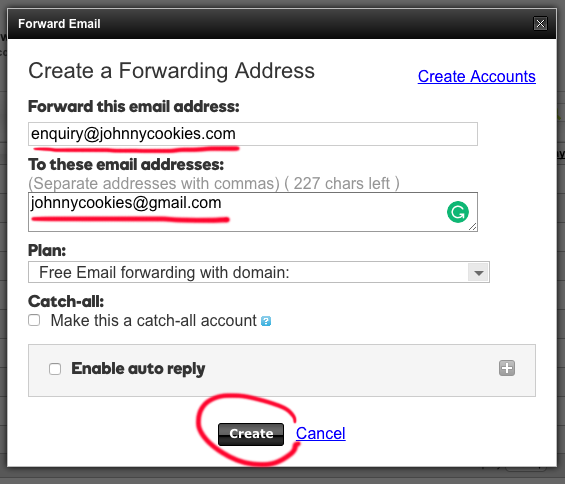
1c: Create a forwarding email address, and specify the destination address. Make sure your destination address is correct.
After clicking the create button, the email server will need few minutes to configure the newly created email address.
Step 2: Create App Password in your Google account

2a: Next, we need to create an application-specific password in your Google account. Keep in mind that this will require you to enable the 2-step verification. If you don’t know how to enable it, follow the steps on Google’s 2-step verification page. You will need to complete this otherwise Google will not allow you to create an application-specific password.
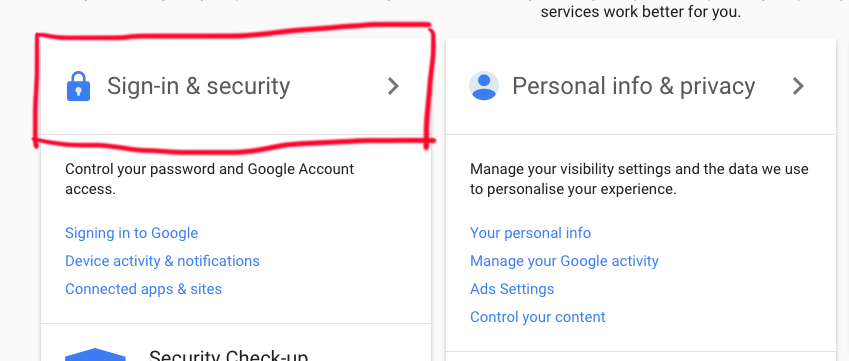
2b: After activating your 2-step verification, head over to myaccount.google.com. Click “Sign-in & Security”.
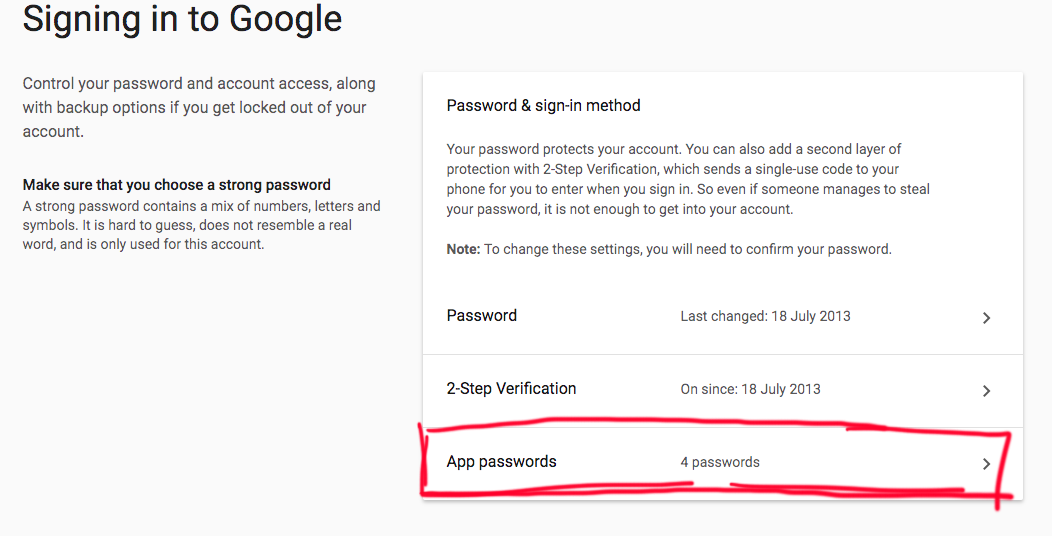
2c: Click “App passwords”, Google may prompt you to re-enter your password before proceeding.
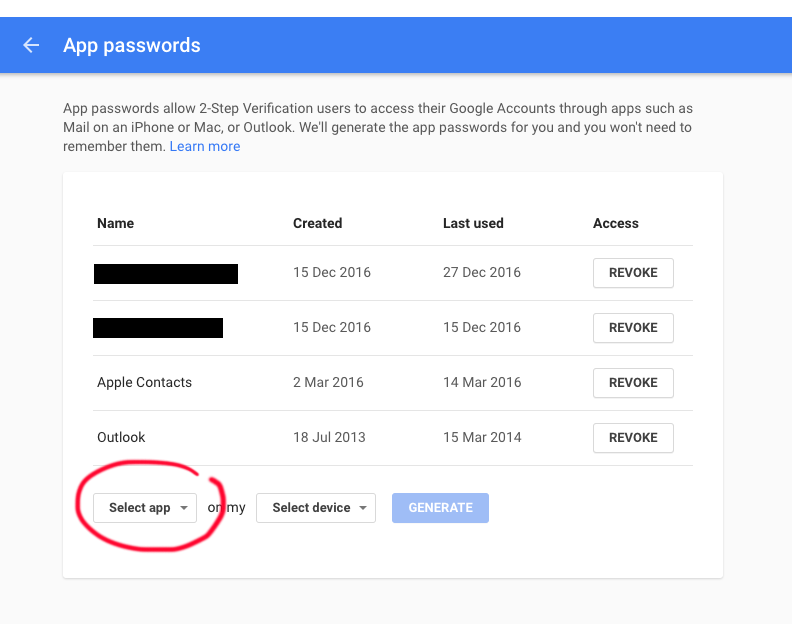
2e: Here’s the list of app passwords. As you can see, I have 4 app password configured. Click on the app drop-down-list.
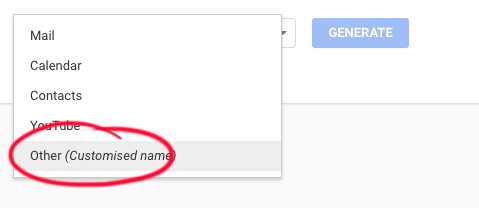
2f: Select “Other” so that we can customise the name.
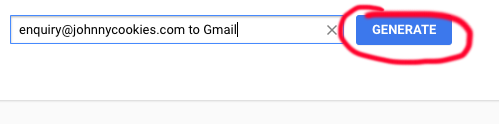
2g: Say we’re naming it that way. Click “Generate”
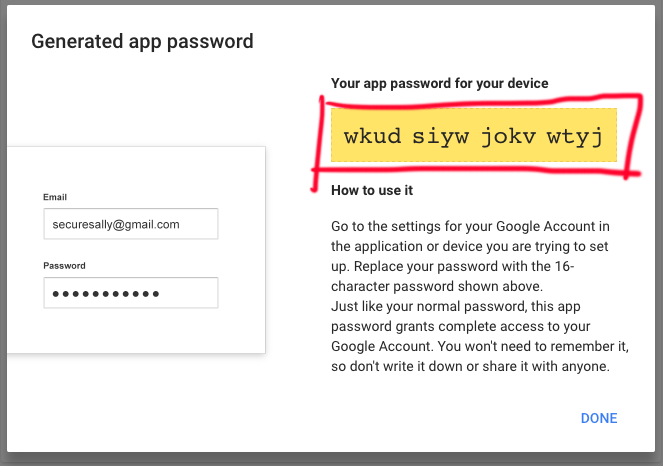
2f: Copy and save the password somewhere. We will need this app password in Step 3d.
Take Note: Do not disclose the password to anyone. I’m just showing you a sample, the password you get will be different from this.
Step 3: Configure your Gmail
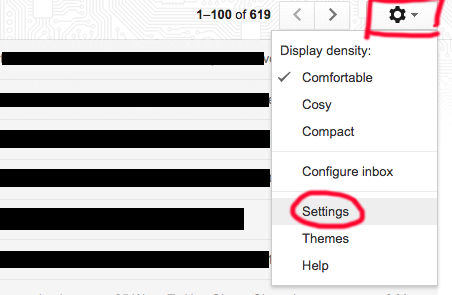
3a: Head over to your Gmail. Click the Gear button and select “Settings”.

3b: Go to “Accounts and Import”, Click “Add another email address”.
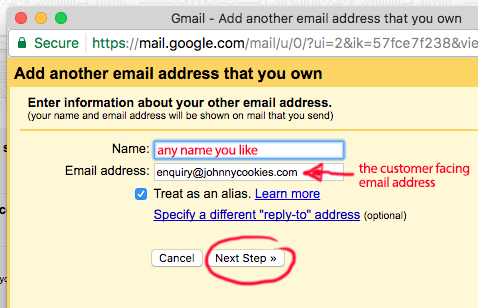
3c: A popup window appears. You can use any name you like. the email address must be the one you want your customers to see.
The email address MUST be the one you want your customers to see. Just now we created [email protected], hence we’re setting it up over here.
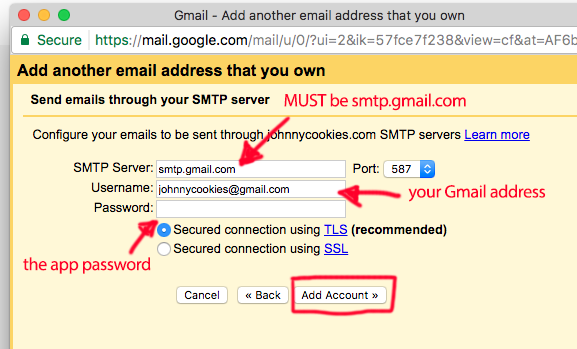
3d: Three crucial information for this whole configuration to work.
- The SMTP server MUST be smtp.gmail.com
- The Username is YOUR Gmail address (gmail.com)
- The Password is the App Password we obtain from Step 2f.
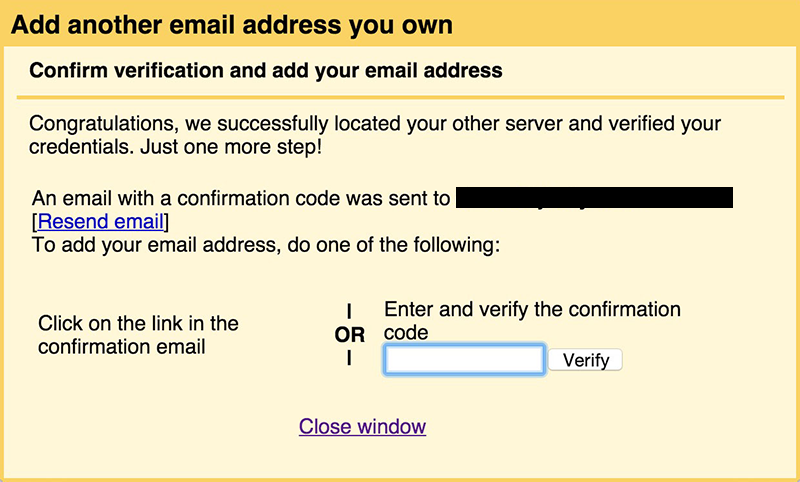
3e: A confirmation email will be sent to [email protected].
If everything is configured properly, you will receive the confirmation email in your Gmail inbox, click on the link in the confirmation email or manually enter the confirmation code to complete the whole process.
Step 4: Test if everything works
Now you may test if everything works as it intended.