Review: Vortex POK3R RGB Mechanical Keyboard
8 min read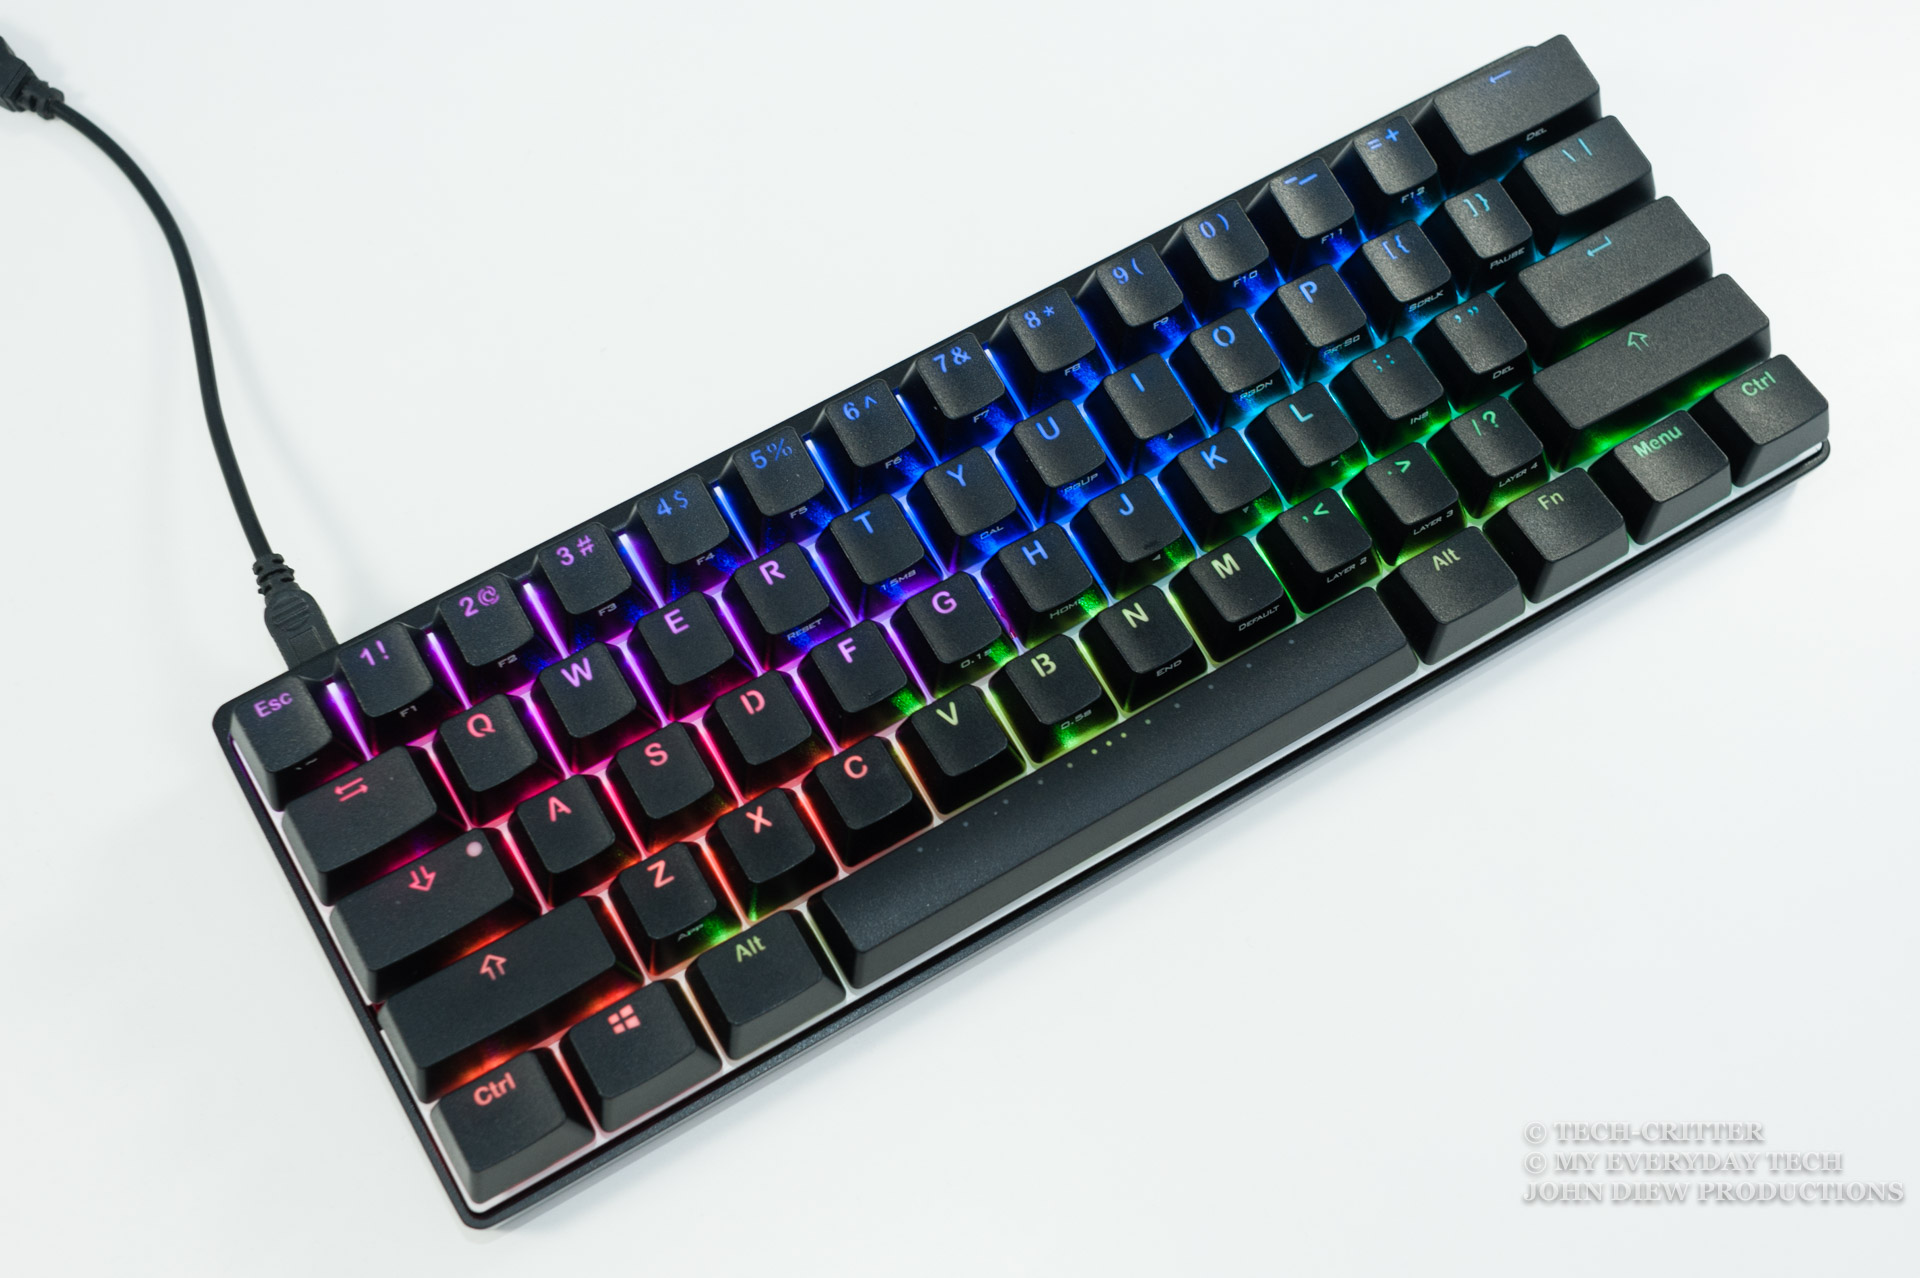
Vortex POK3R RGB
RM 599
Pros
- Solid build quality
- Heavy cast aluminium chassis
- Detachable USB cable
- Double shot ABS
- Cherry MX switches
- No software needed
- 3 programmable layers
- Bright RGB LED
- Excellent LED customisation options
Cons
- Not double shot PBT + POM
- Steep learning curve
- Arrow cluster should be at WASD
- LED and Multimedia shortcut not printed on keycaps
- Weird programmable key function behavior
- Doesn't come cheap
When we mention about keyboards, the first image that comes to your mind is probably your Dell or Logitech keyboards. Or perhaps, you’re exposed to the gaming industry and currently rocking one of those gaming mechanical keyboards from Cooler Master, Corsair, Logitech G or Razer.
Today I’m going to show you something rather special compared to your everyday keyboards. What I have in My Everyday Tech’s lab is the Vortex POK3R RGB mechanical keyboard. It features a 60% layout instead of the regular 100% or 80% layout. Why 60%? Because the keyboard has 61 keys as opposed to the regular full sized 104 keys.
By the way, Vortex has a standard non-RGB version of the POK3R few years before this. Hence, this is basically the same POK3R with some different configuration to support the LED options. So what does Vortex has to offer for such a small keyboard at the price tag of RM599? Read on to find out.
Video Review
Vortex POK3R RGB Unboxing
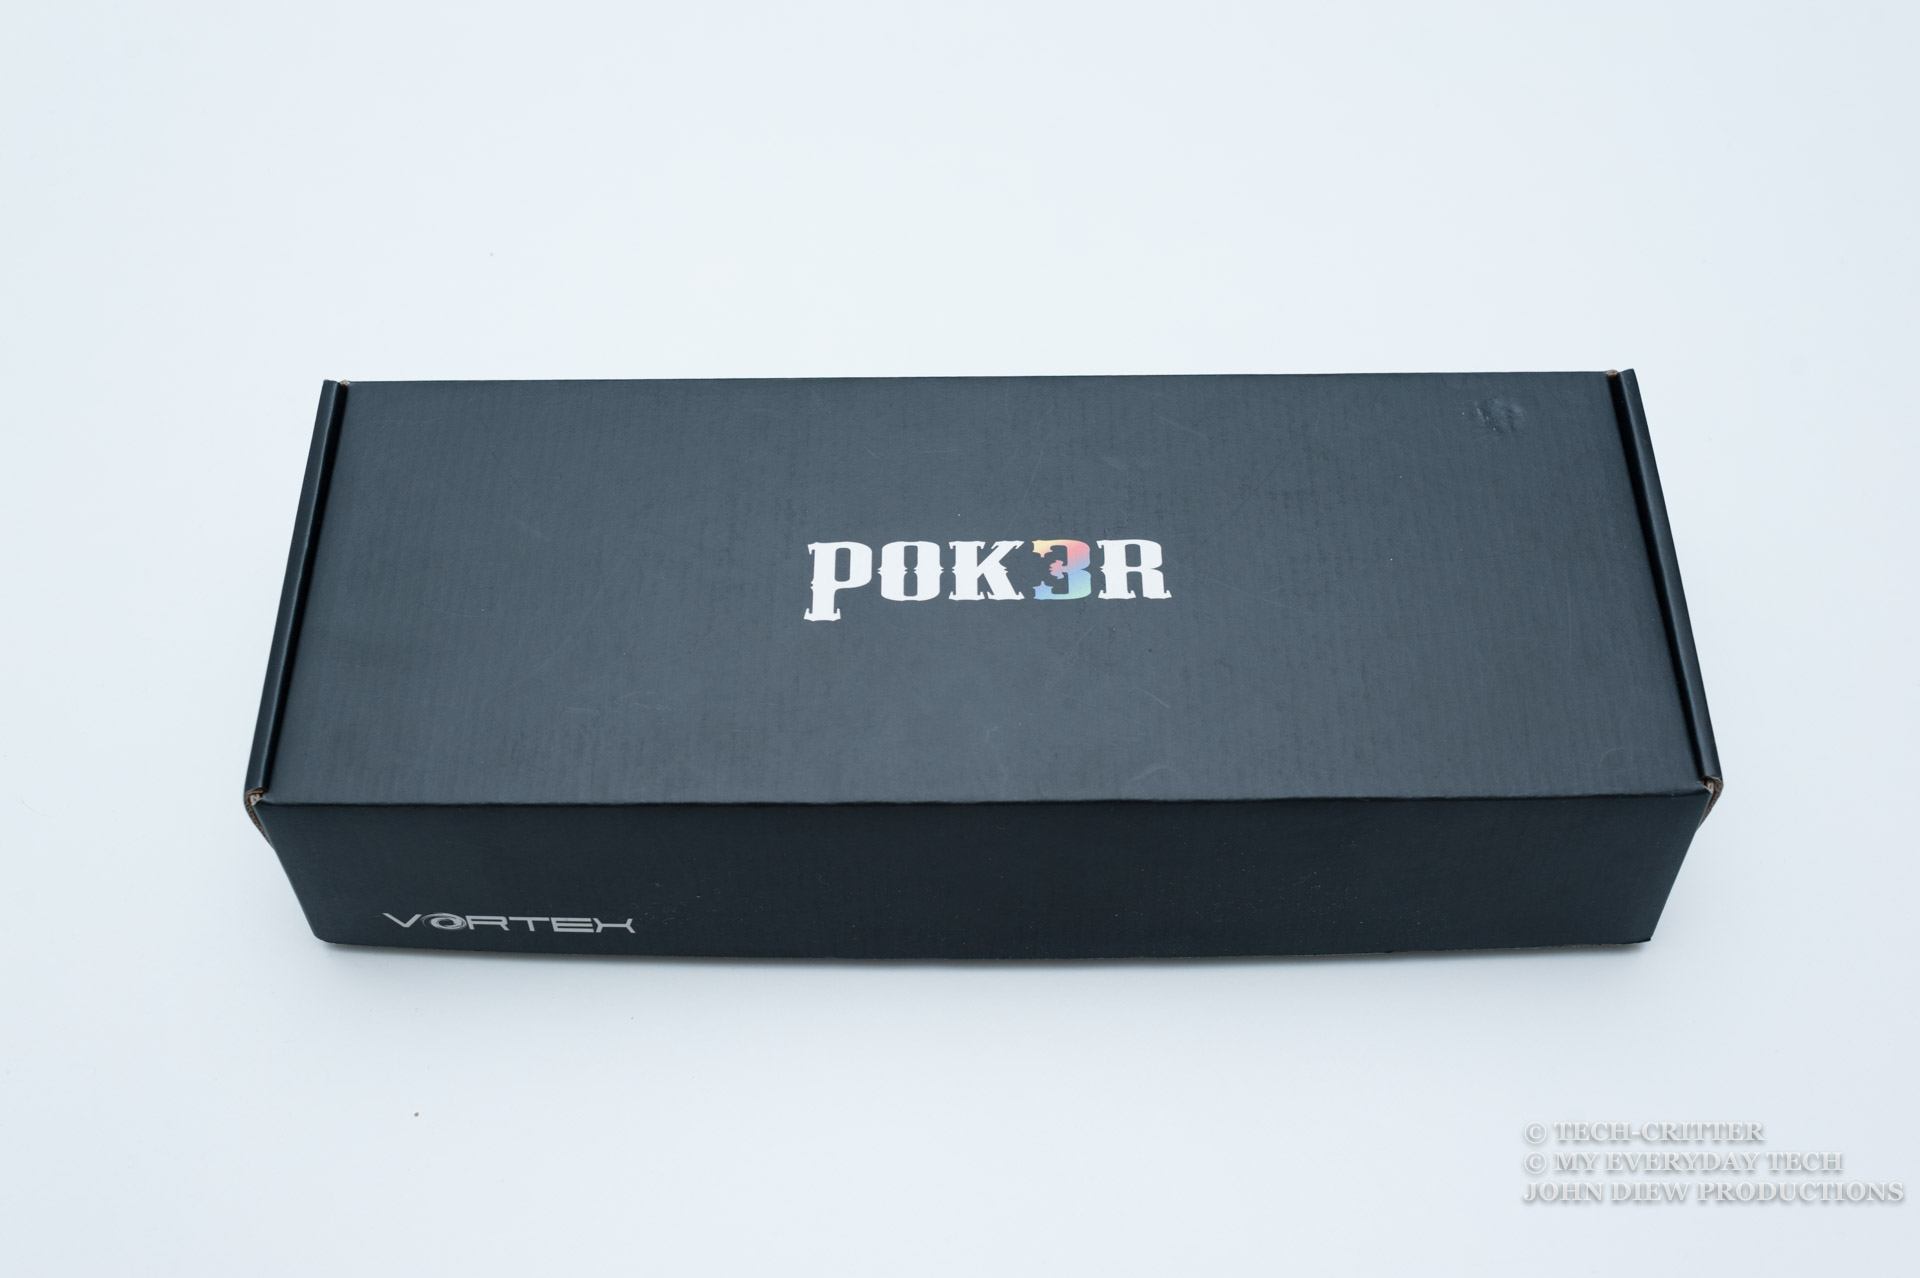
The POK3R RGB comes in a familiar black package with the rainbow-coloured word “3” to indicate this is an RGB variant.
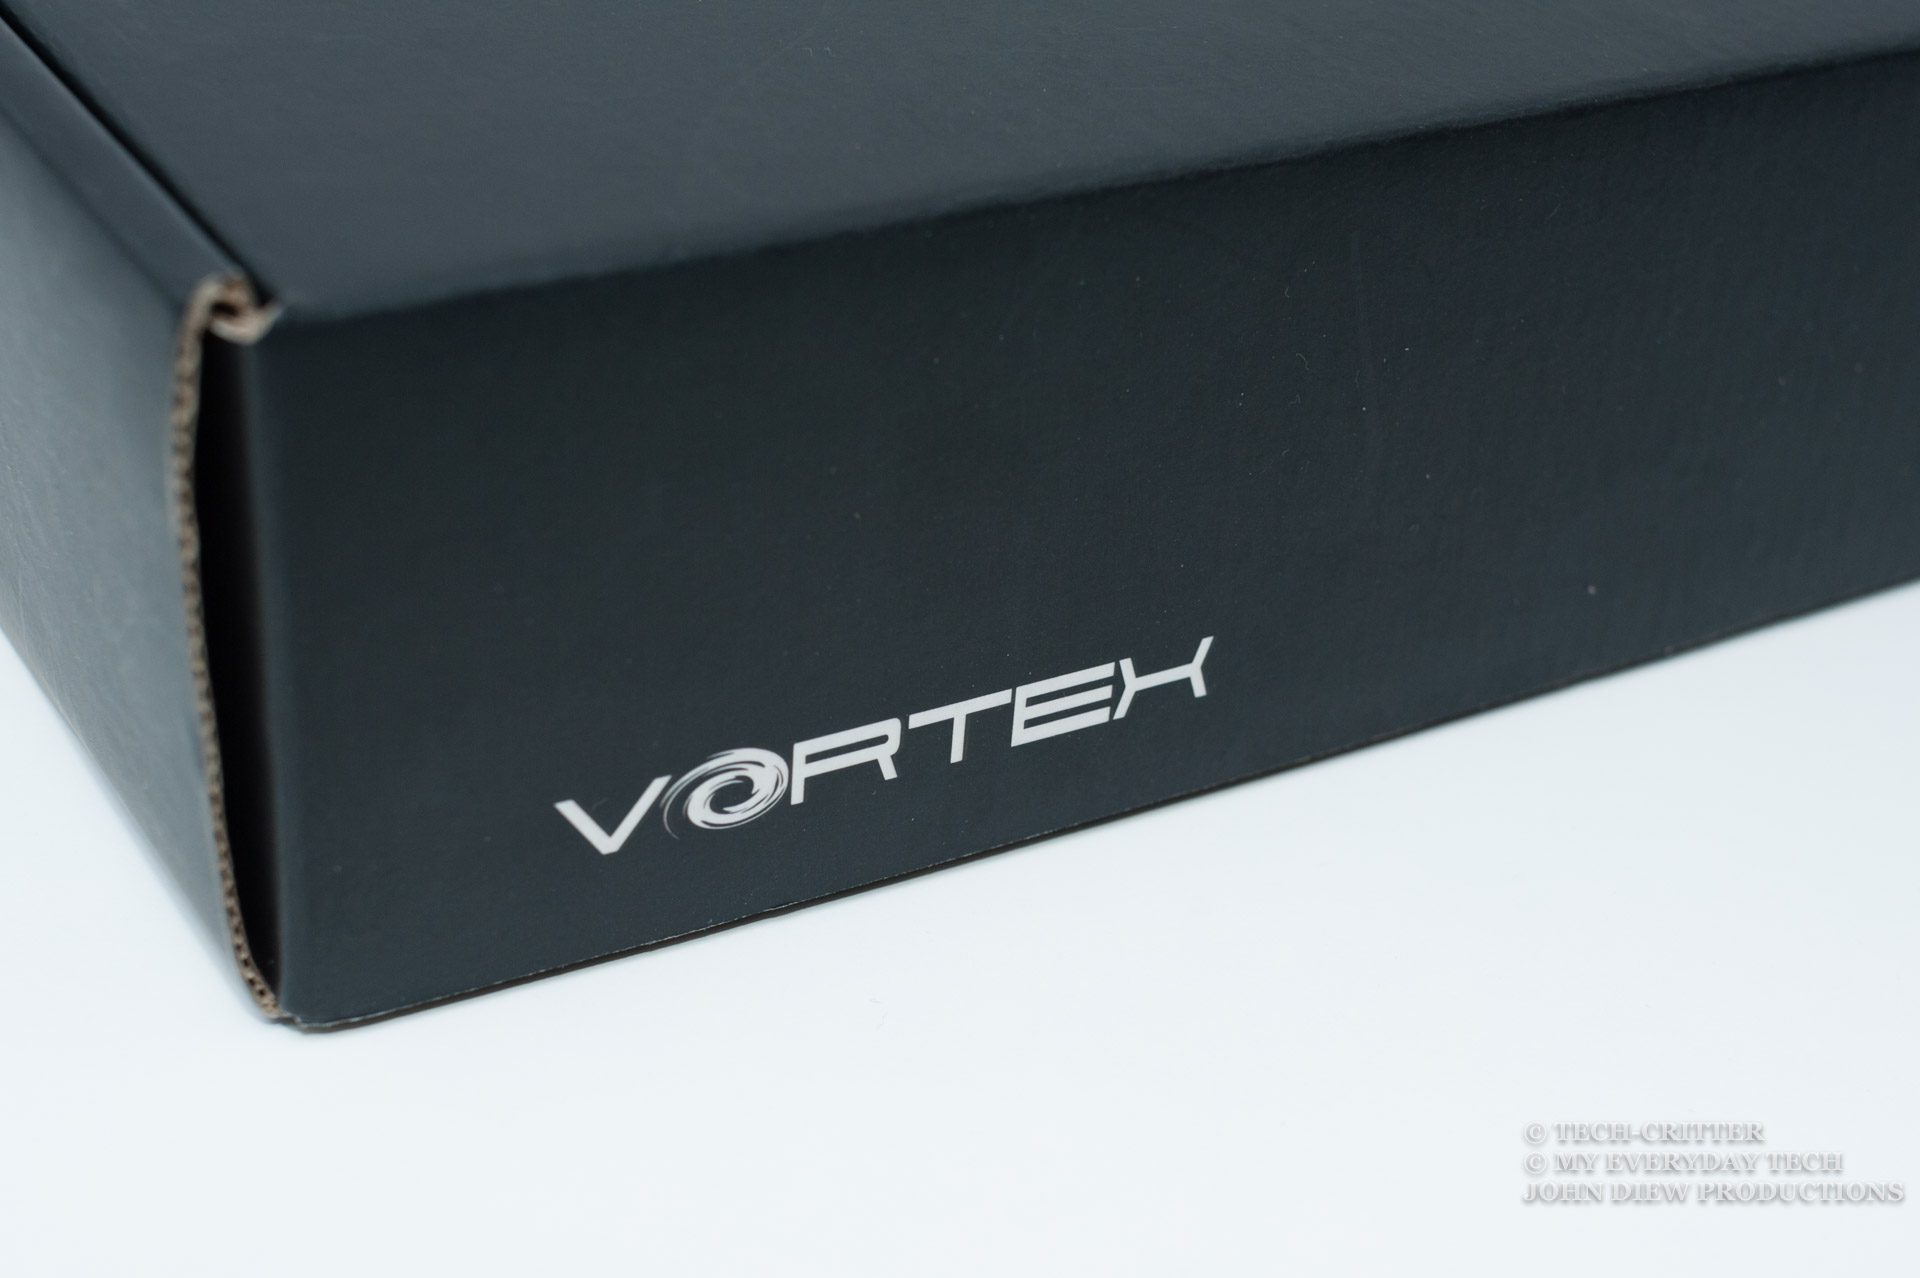
Overall, the box has clean and minimalist design with Vortex brand logo at the corner.

Open box reveals another layer of card box that offers extra protection for the keyboard.
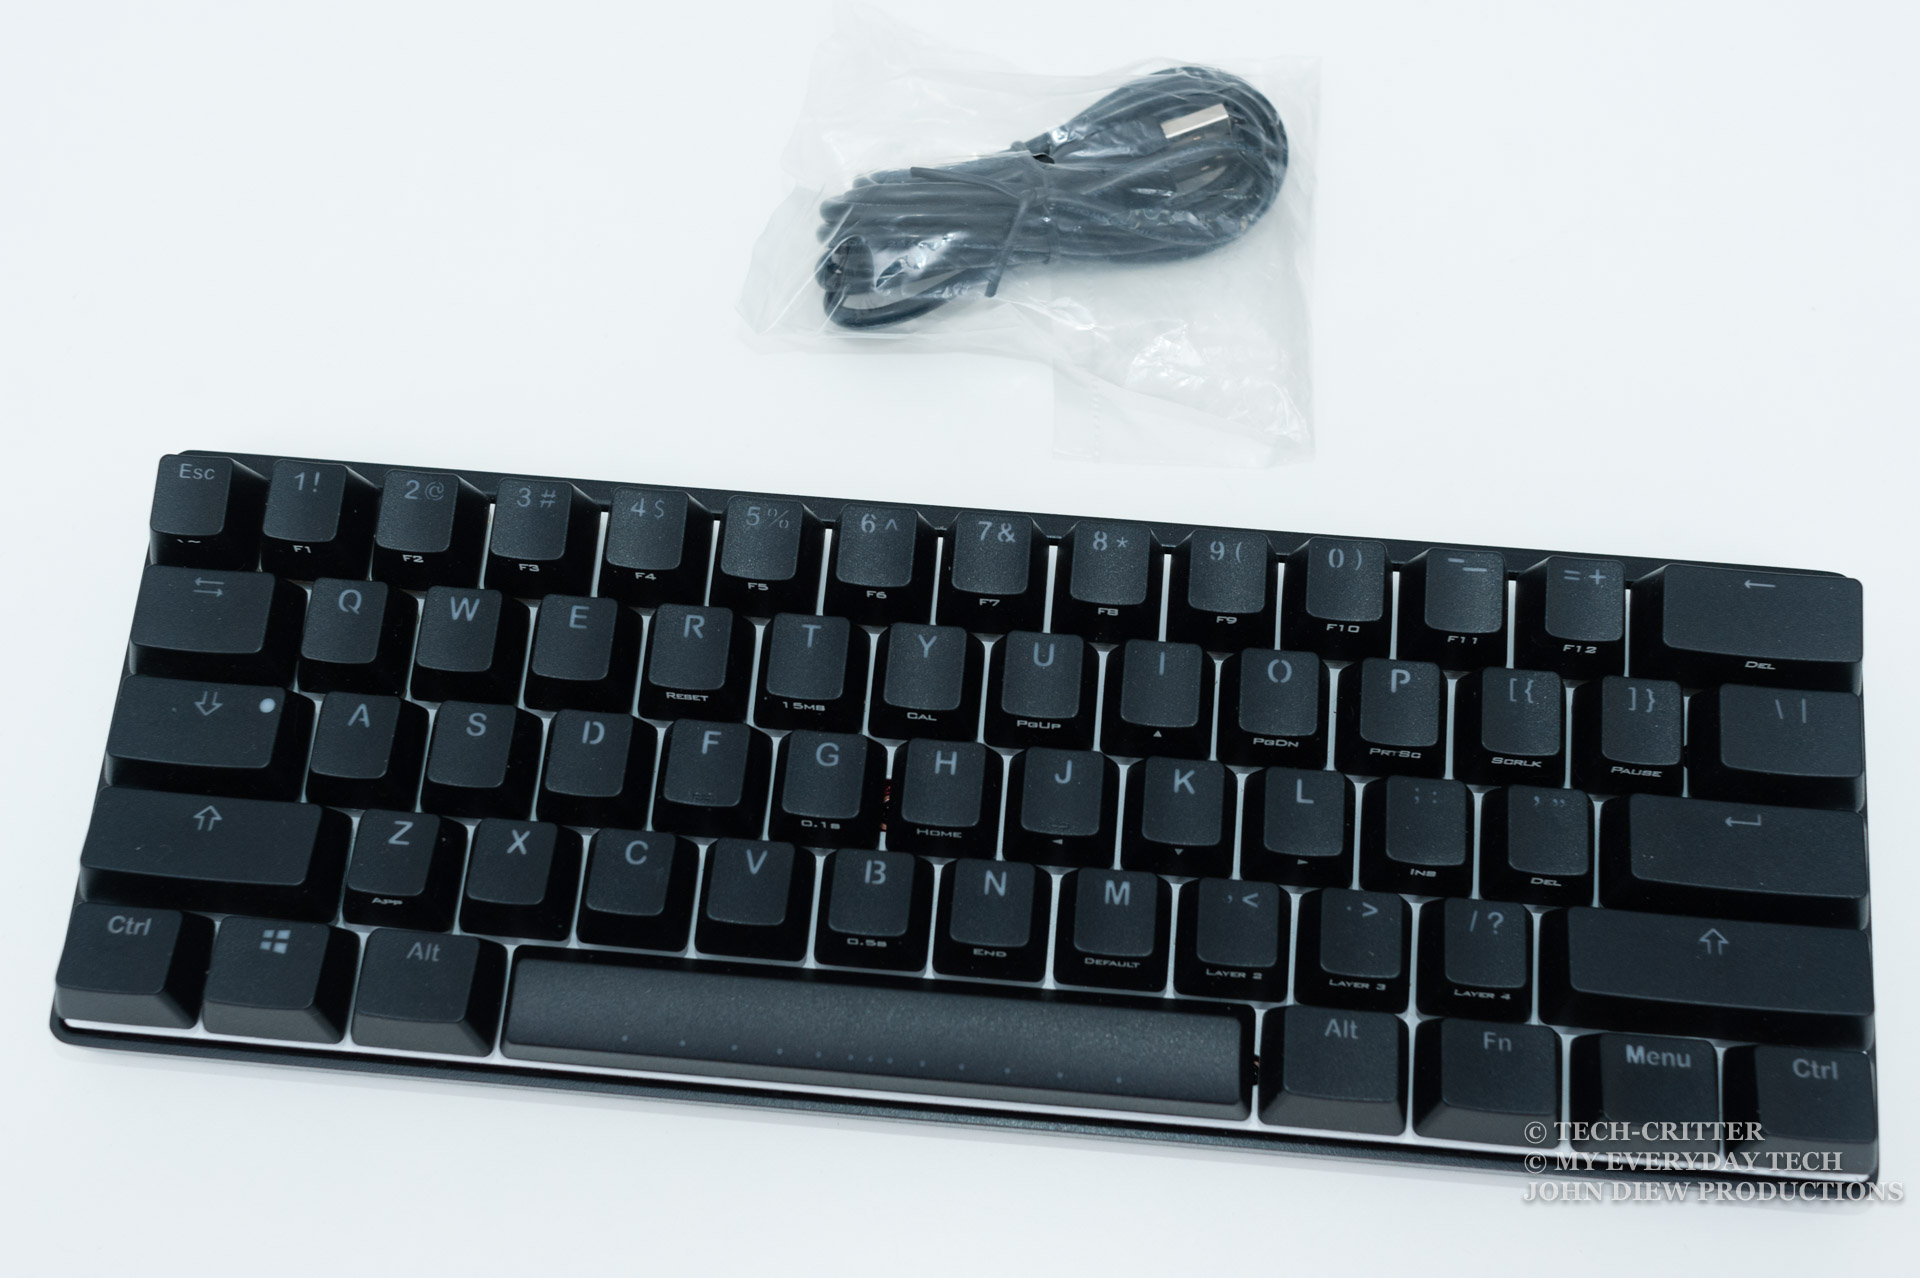
The package comes with the keyboard and the USB cable only. Just like the regular version, you don’t get any custom keycaps or the keycap puller. Even the user manual is only available on Vortex’s website.
So what’s the difference between this and the regular POK3R?
| POK3R | POK3R RGB | |
|---|---|---|
| Backlight | No LED backlighting | RGB LED backlighting |
| Frame colour option | Black and White | Black only |
| Base plate colour | Black and White (Matching frame colour) | White only |
| Key caps | Laser engraved thick PBT | Doubleshot ABS |
Basically, the differences are mostly on the appearance side to accommodate the LED backlighting, for example, the translucent double shot ABS keycaps and white back plate for better light reflection.
I’ll explain more about the details at the latter part of this review.
Build Quality
Chassis
The keyboard still retains the original 60% key layout with standard modifier key size.
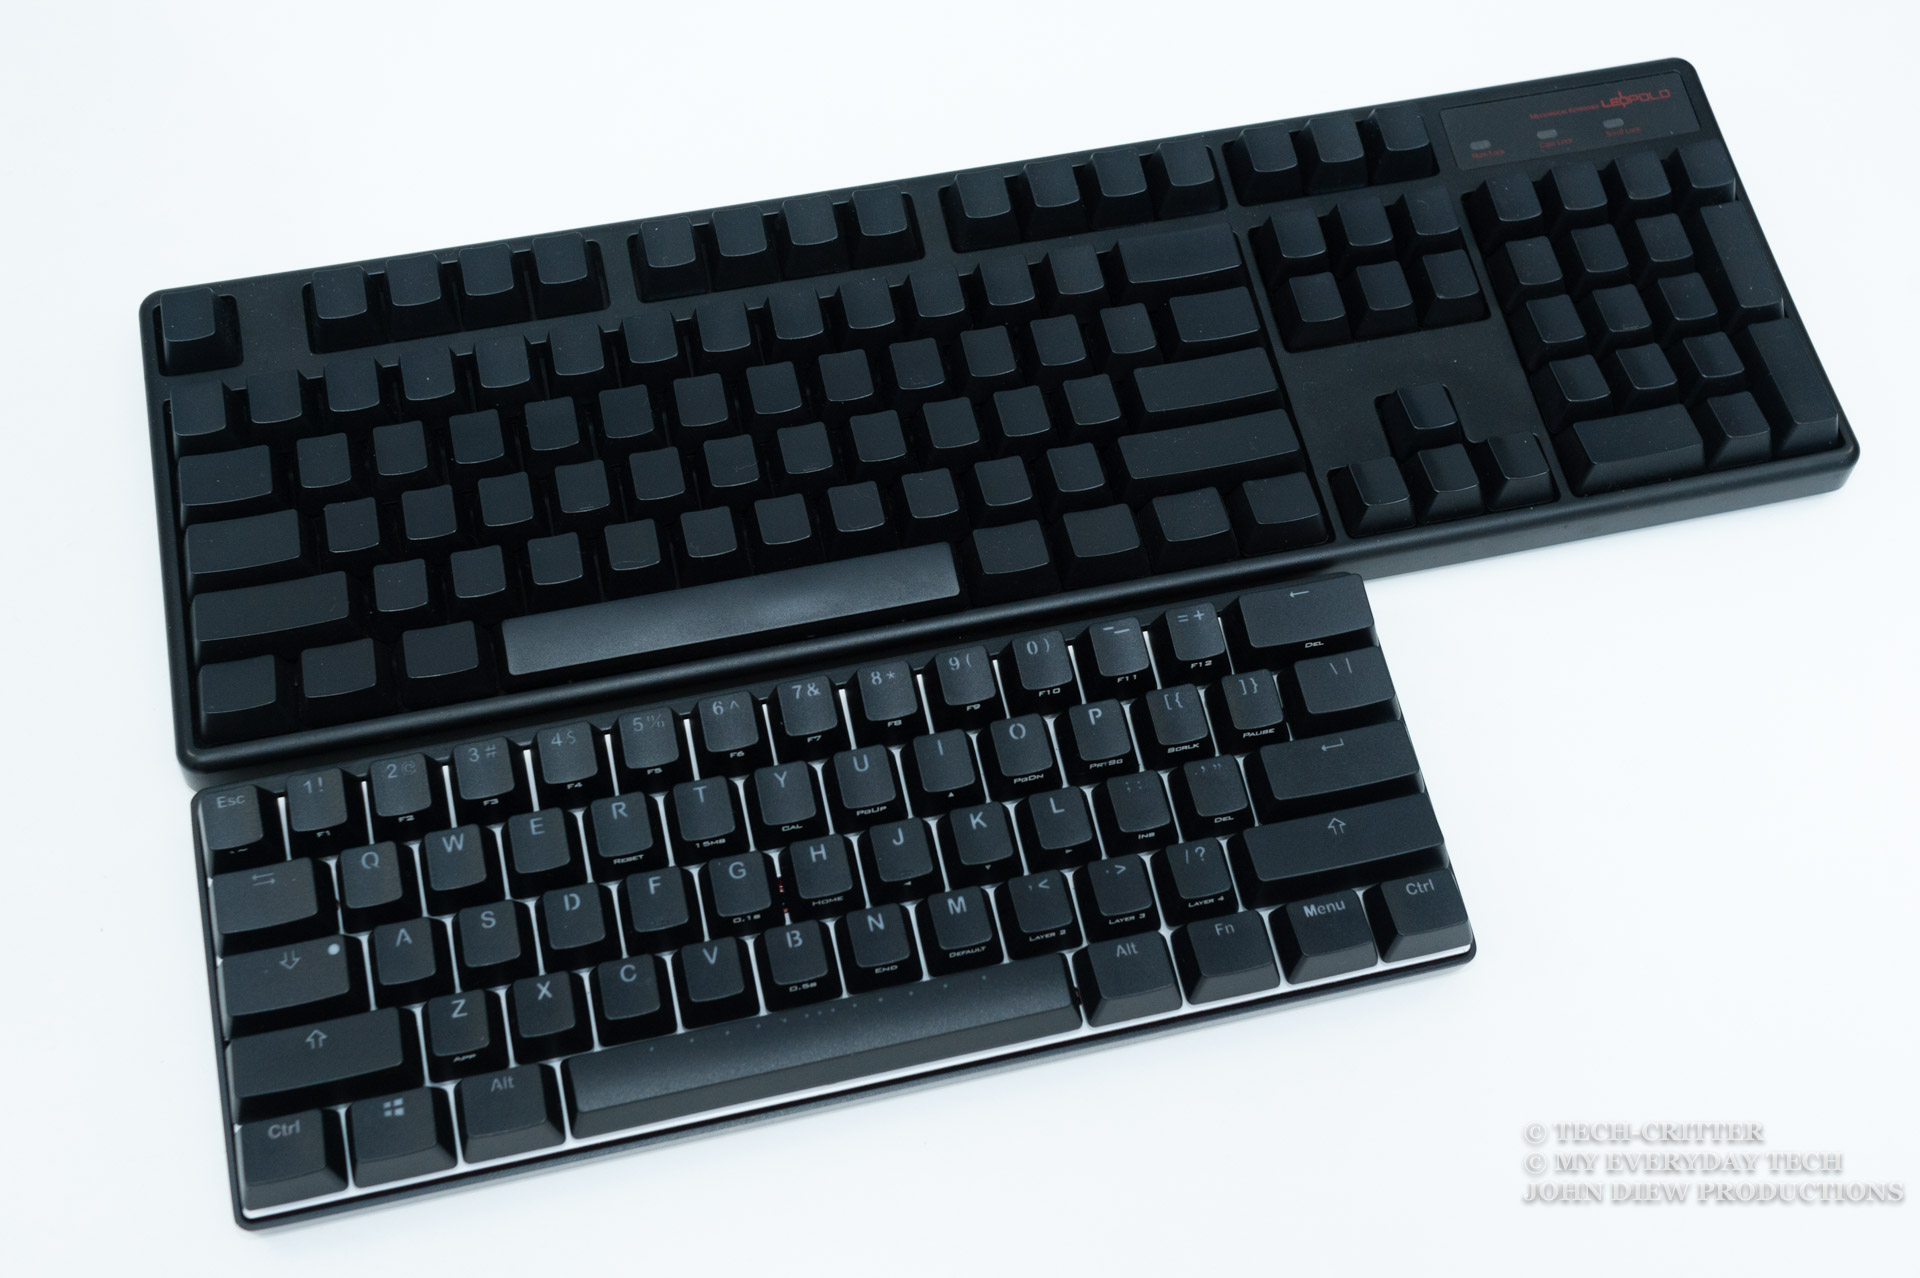
Pictured above is the size comparison with my full sized 104-key Leopold FC500RR.
With the absence of the top function row, navigation cluster and numeric keypad, you definitely can see how miniature the keyboard is.
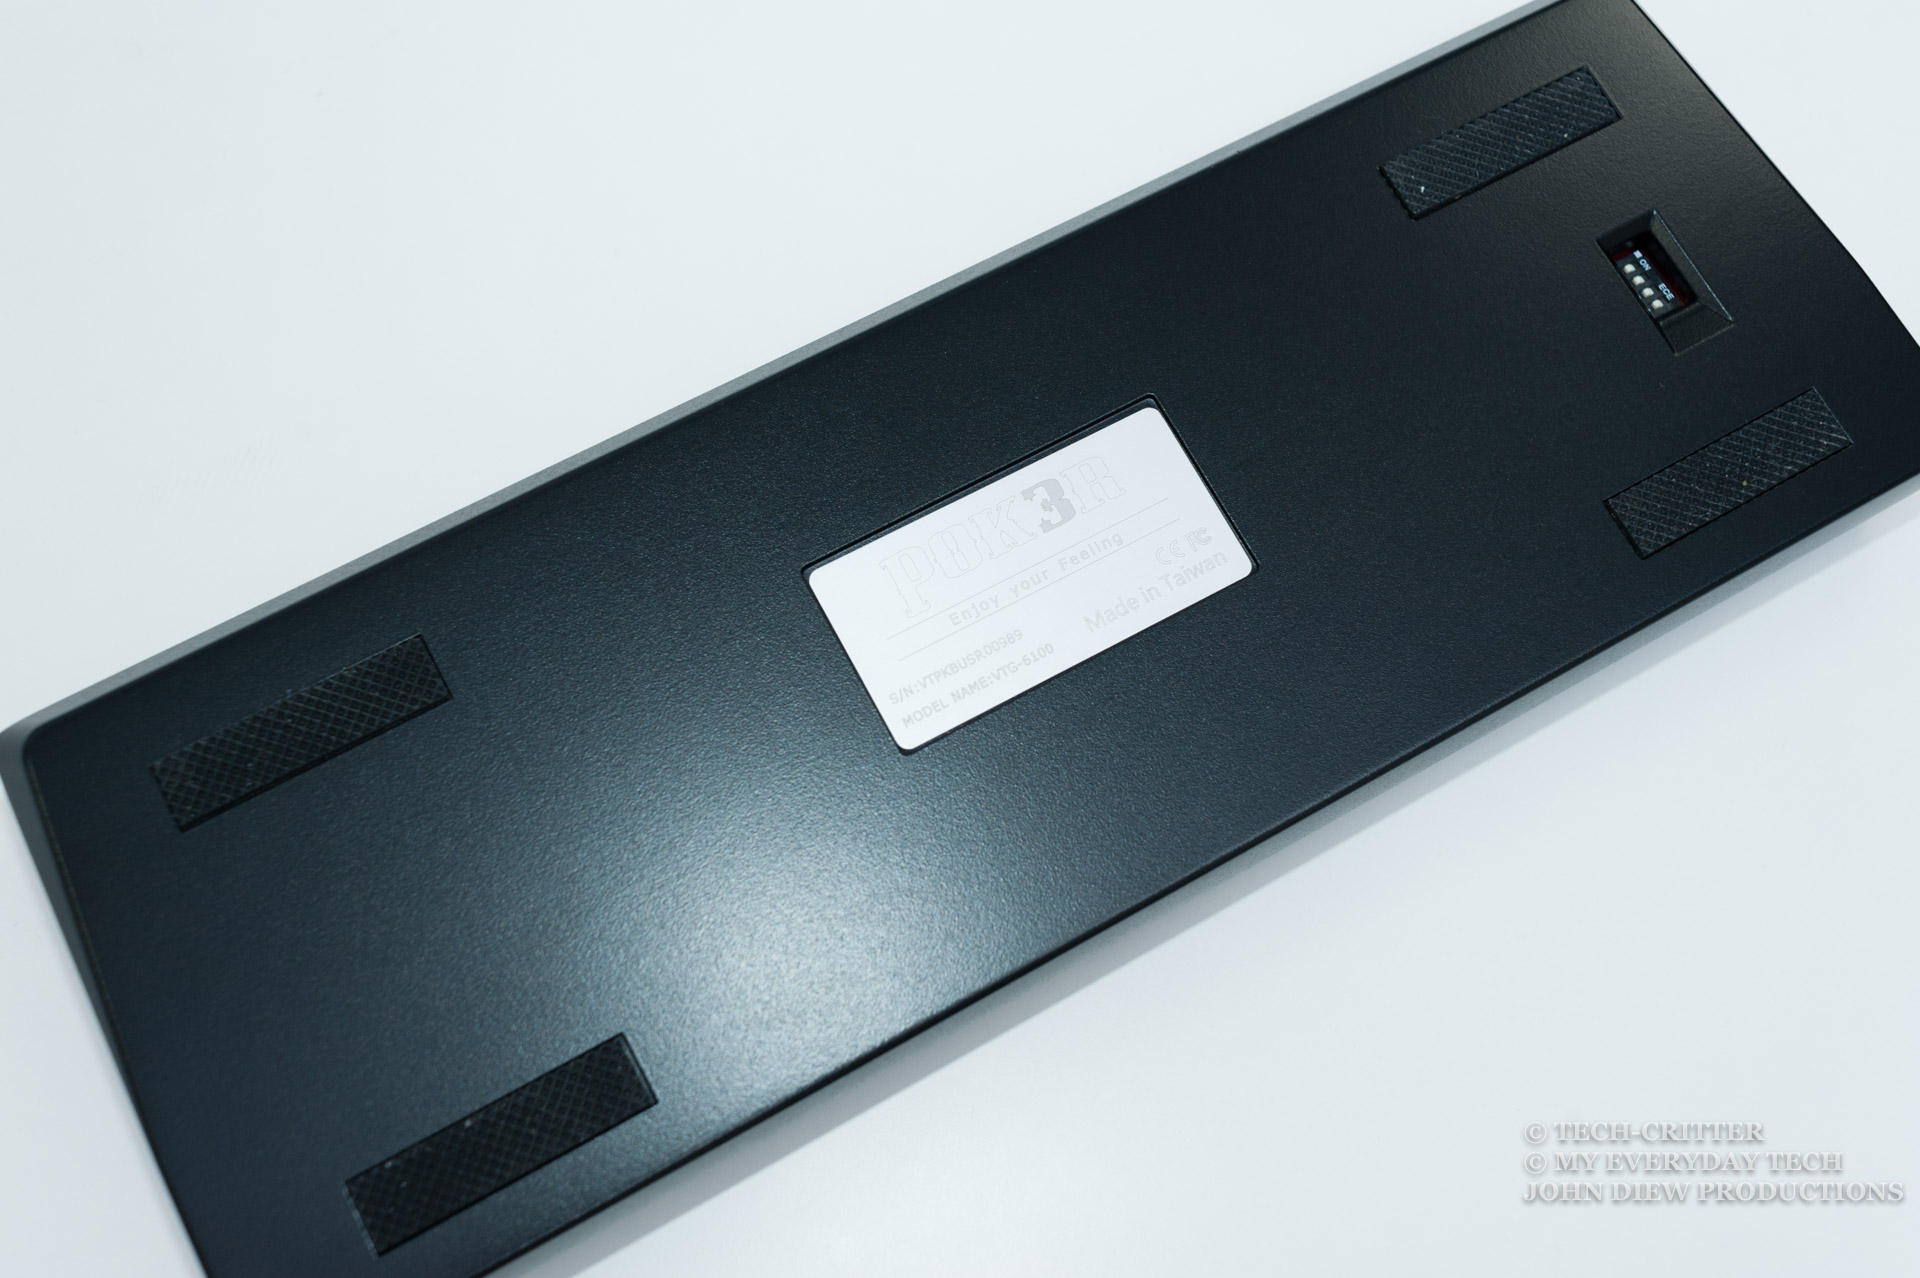
First, we take a good look at the bottom chassis. Just like the regular POK3R, the case is made of cast aluminium and feels extremely solid and heavy. It actually improves the typing feel where each keystroke has a solid landing instead of hollow-ish feel.
It comes with four pieces of rubber feet to make sure your keyboard stays in place.
There’s an opening under the keyboard for easy access to the DIP switches for hardware layer customisation. I’ll talk more about the DIP switch functions in the features section.
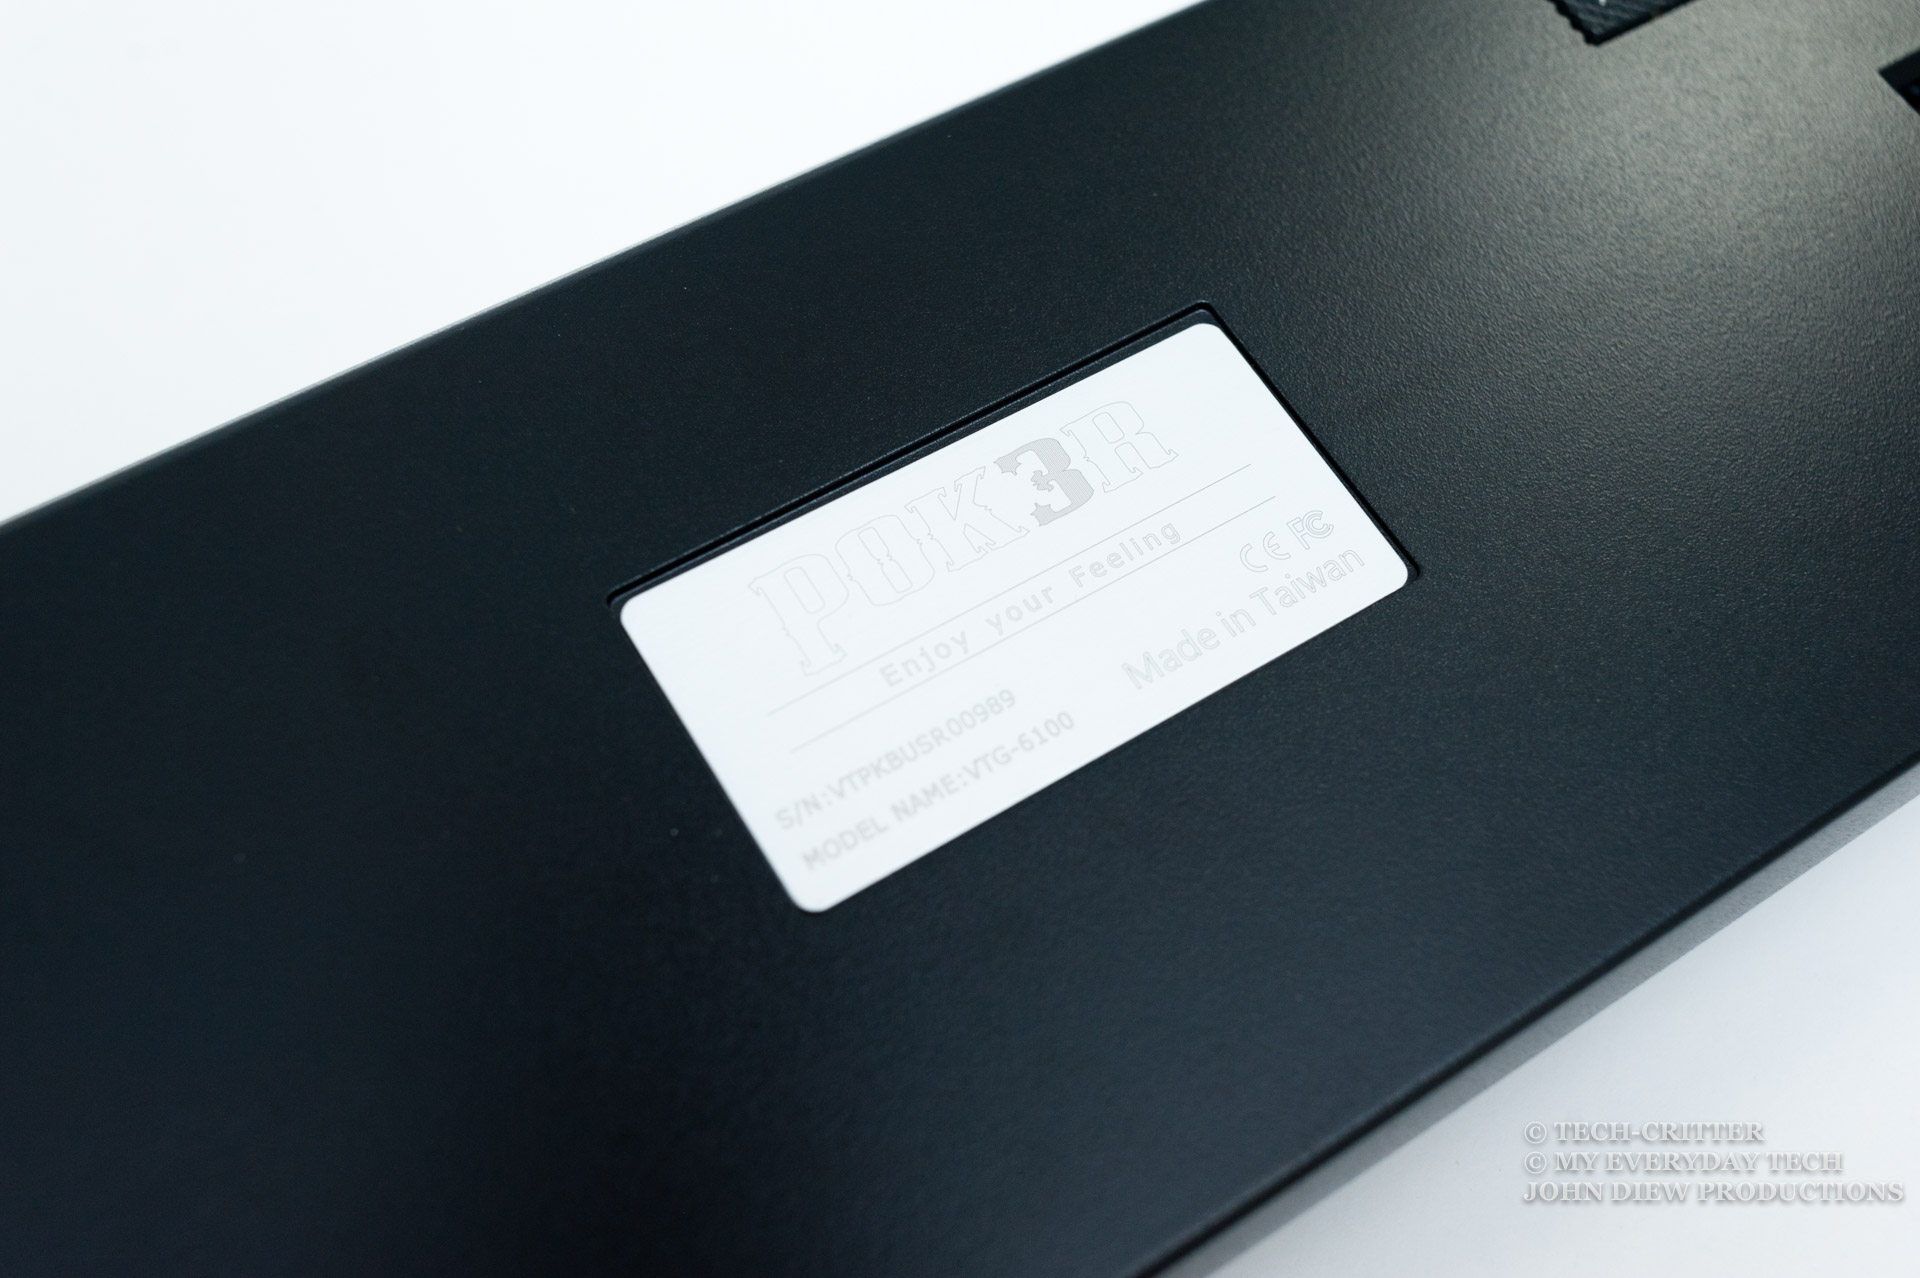
The keyboard name plate is made of metal and laser engraved with the serial number and the tagline – Enjoy Your Feeling.
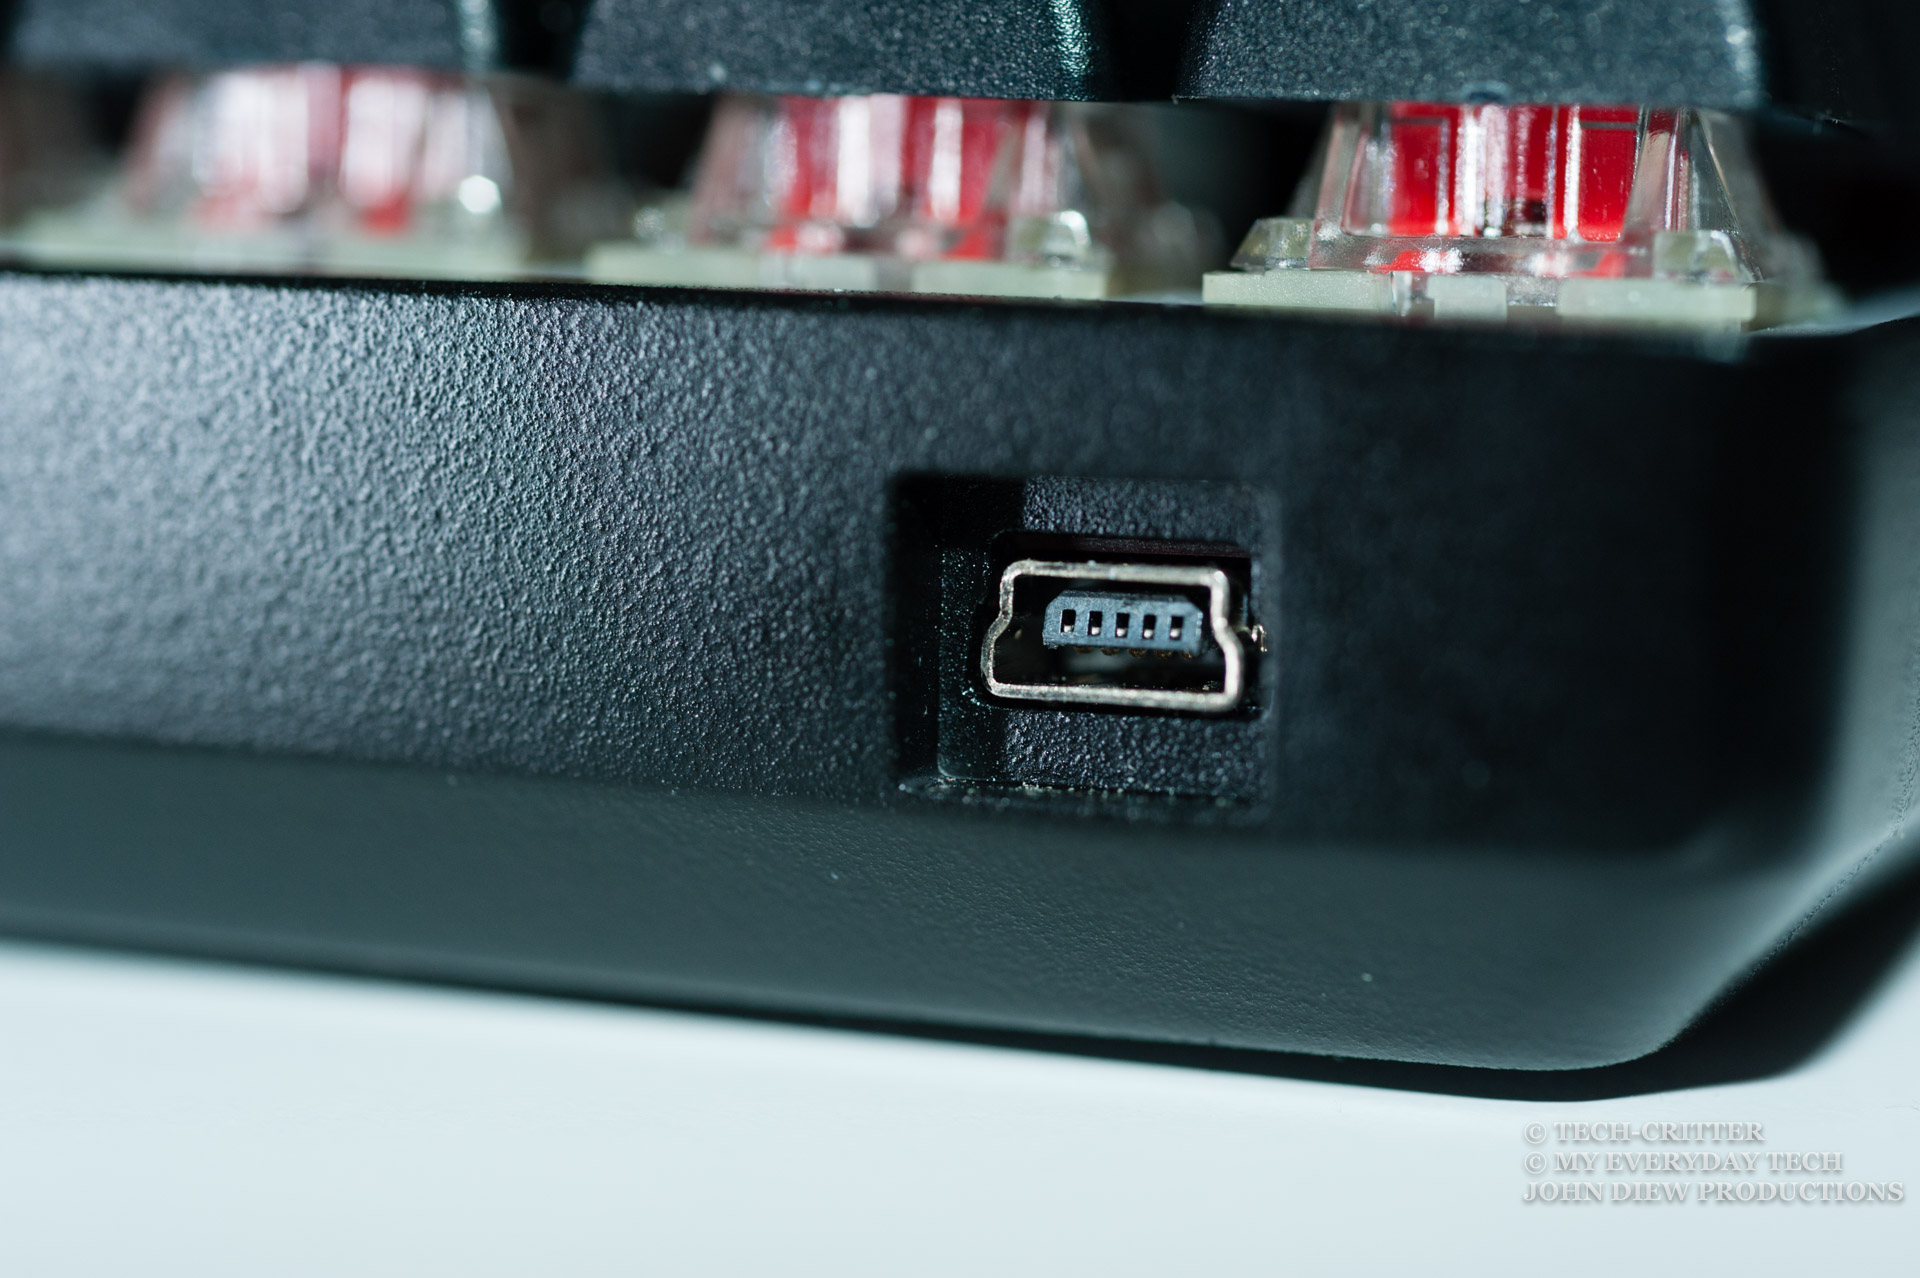
At the era of USB-C and Micro USB, the mini USB felt a little bit dated.
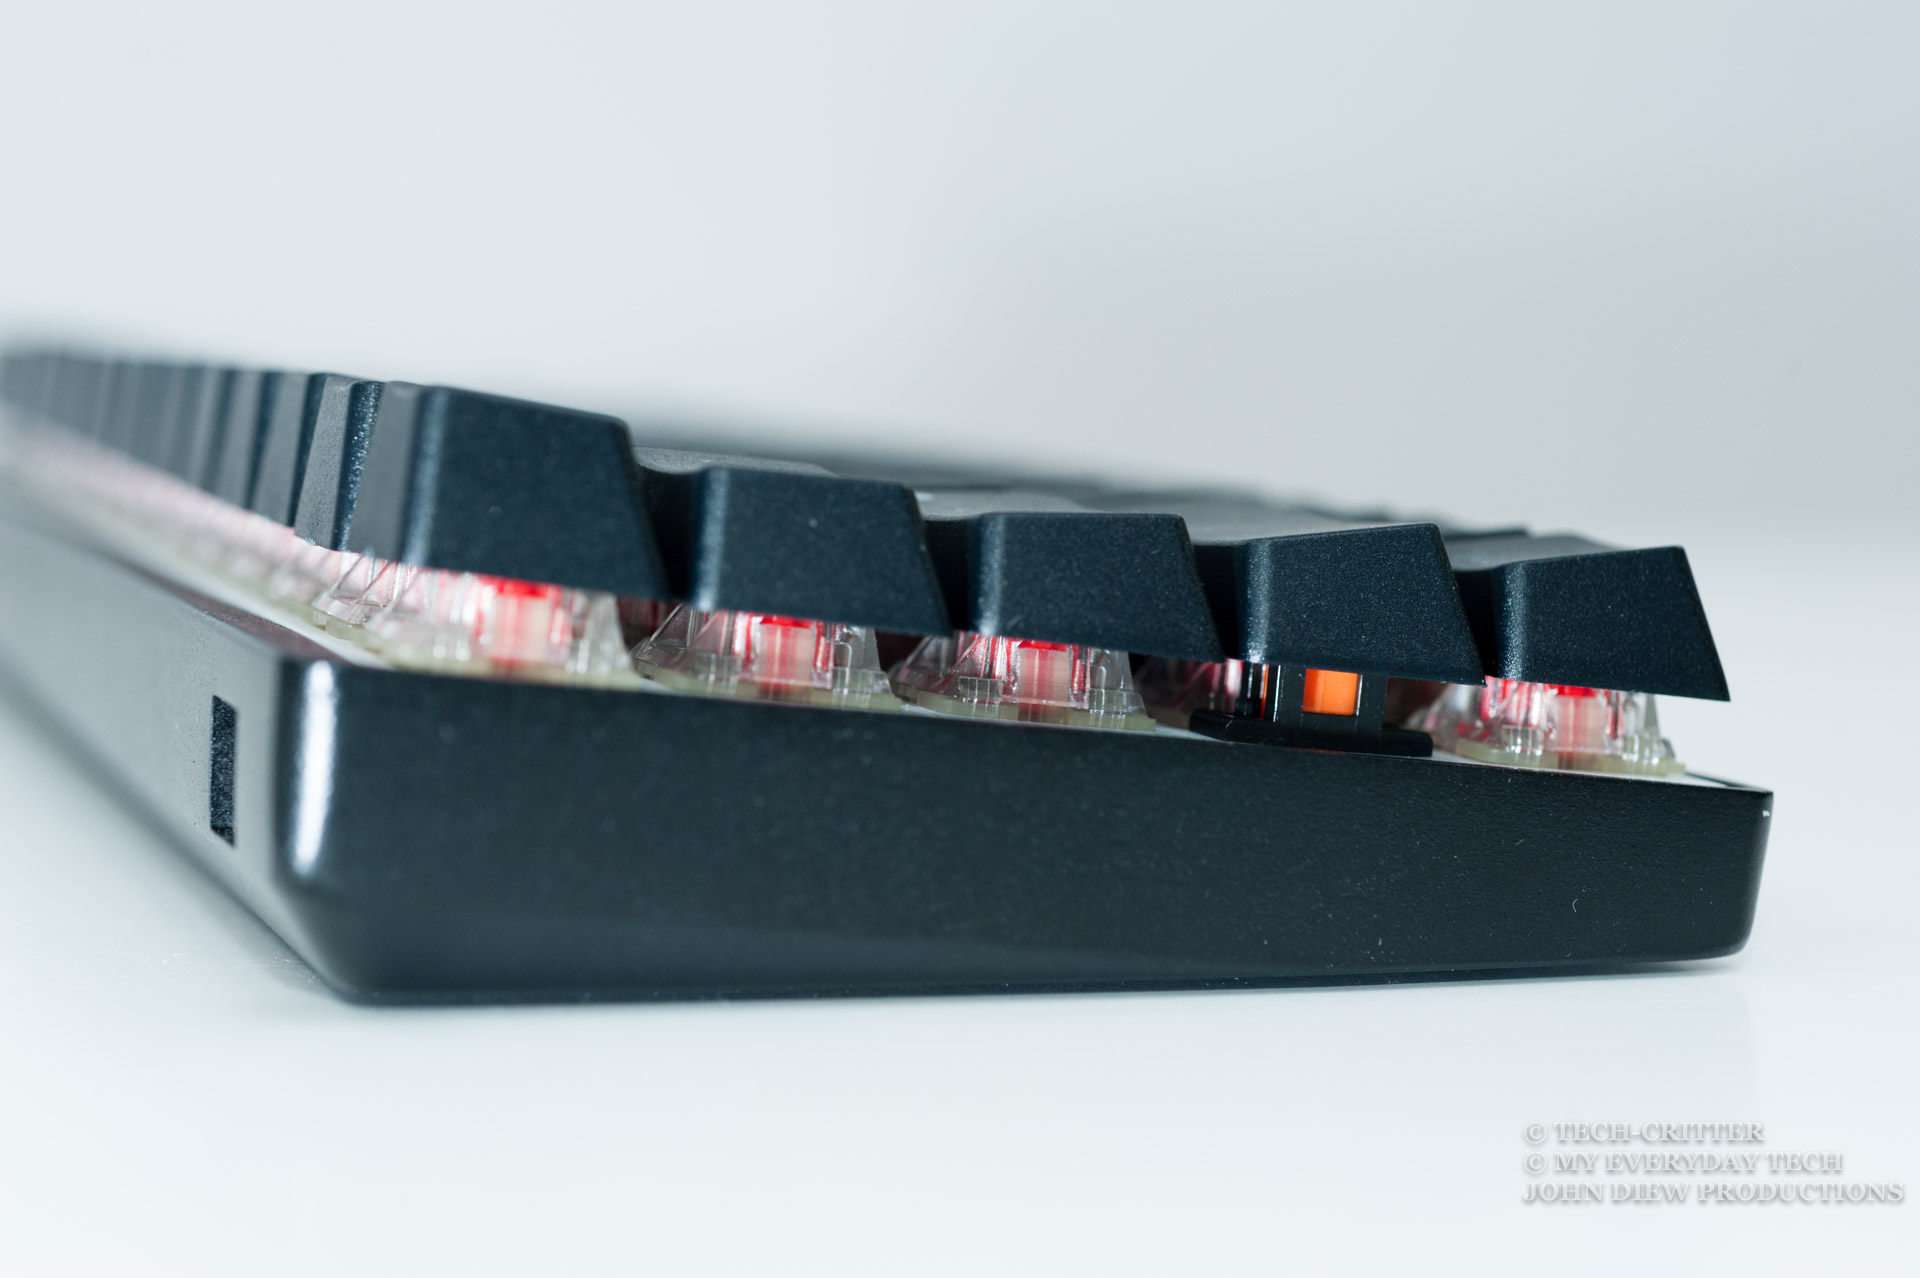
The keycap has a curved profile for improved typing ergonomics.
While it is quite obvious they’re cutting the cost on the cast aluminium casing with the decision of using a low profile chassis, but it gives this keyboard a different characteristic. Allowing you to showcase the transparent mechanical key switch housing and LED blings to your visitors.
Some say it helps to keep the keyboard from collecting dust. Always clean your keyboards guys!
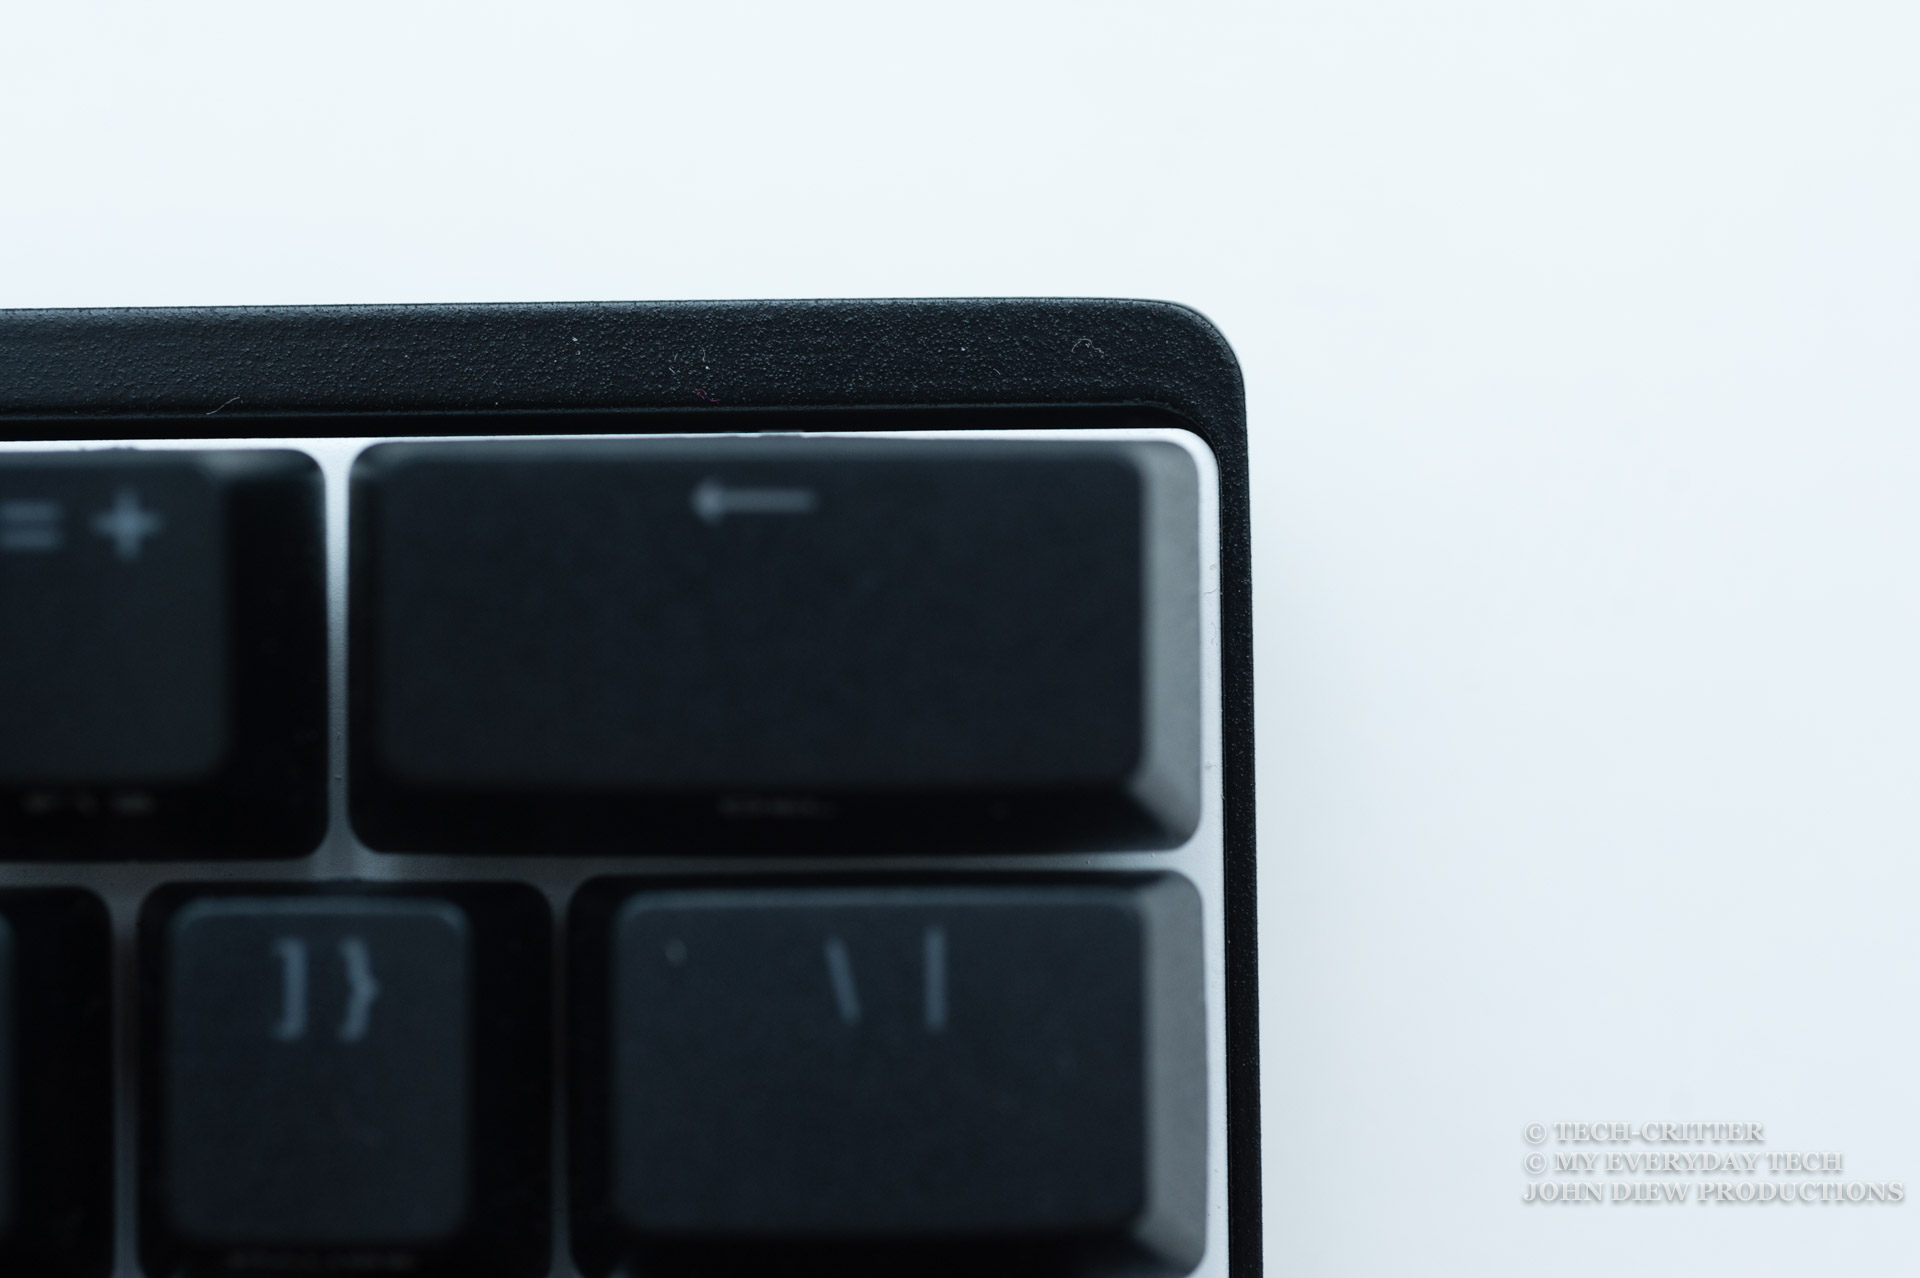
The chassis has thicker top border compared to the rest, to be exact, 5mm compared to 2mm.
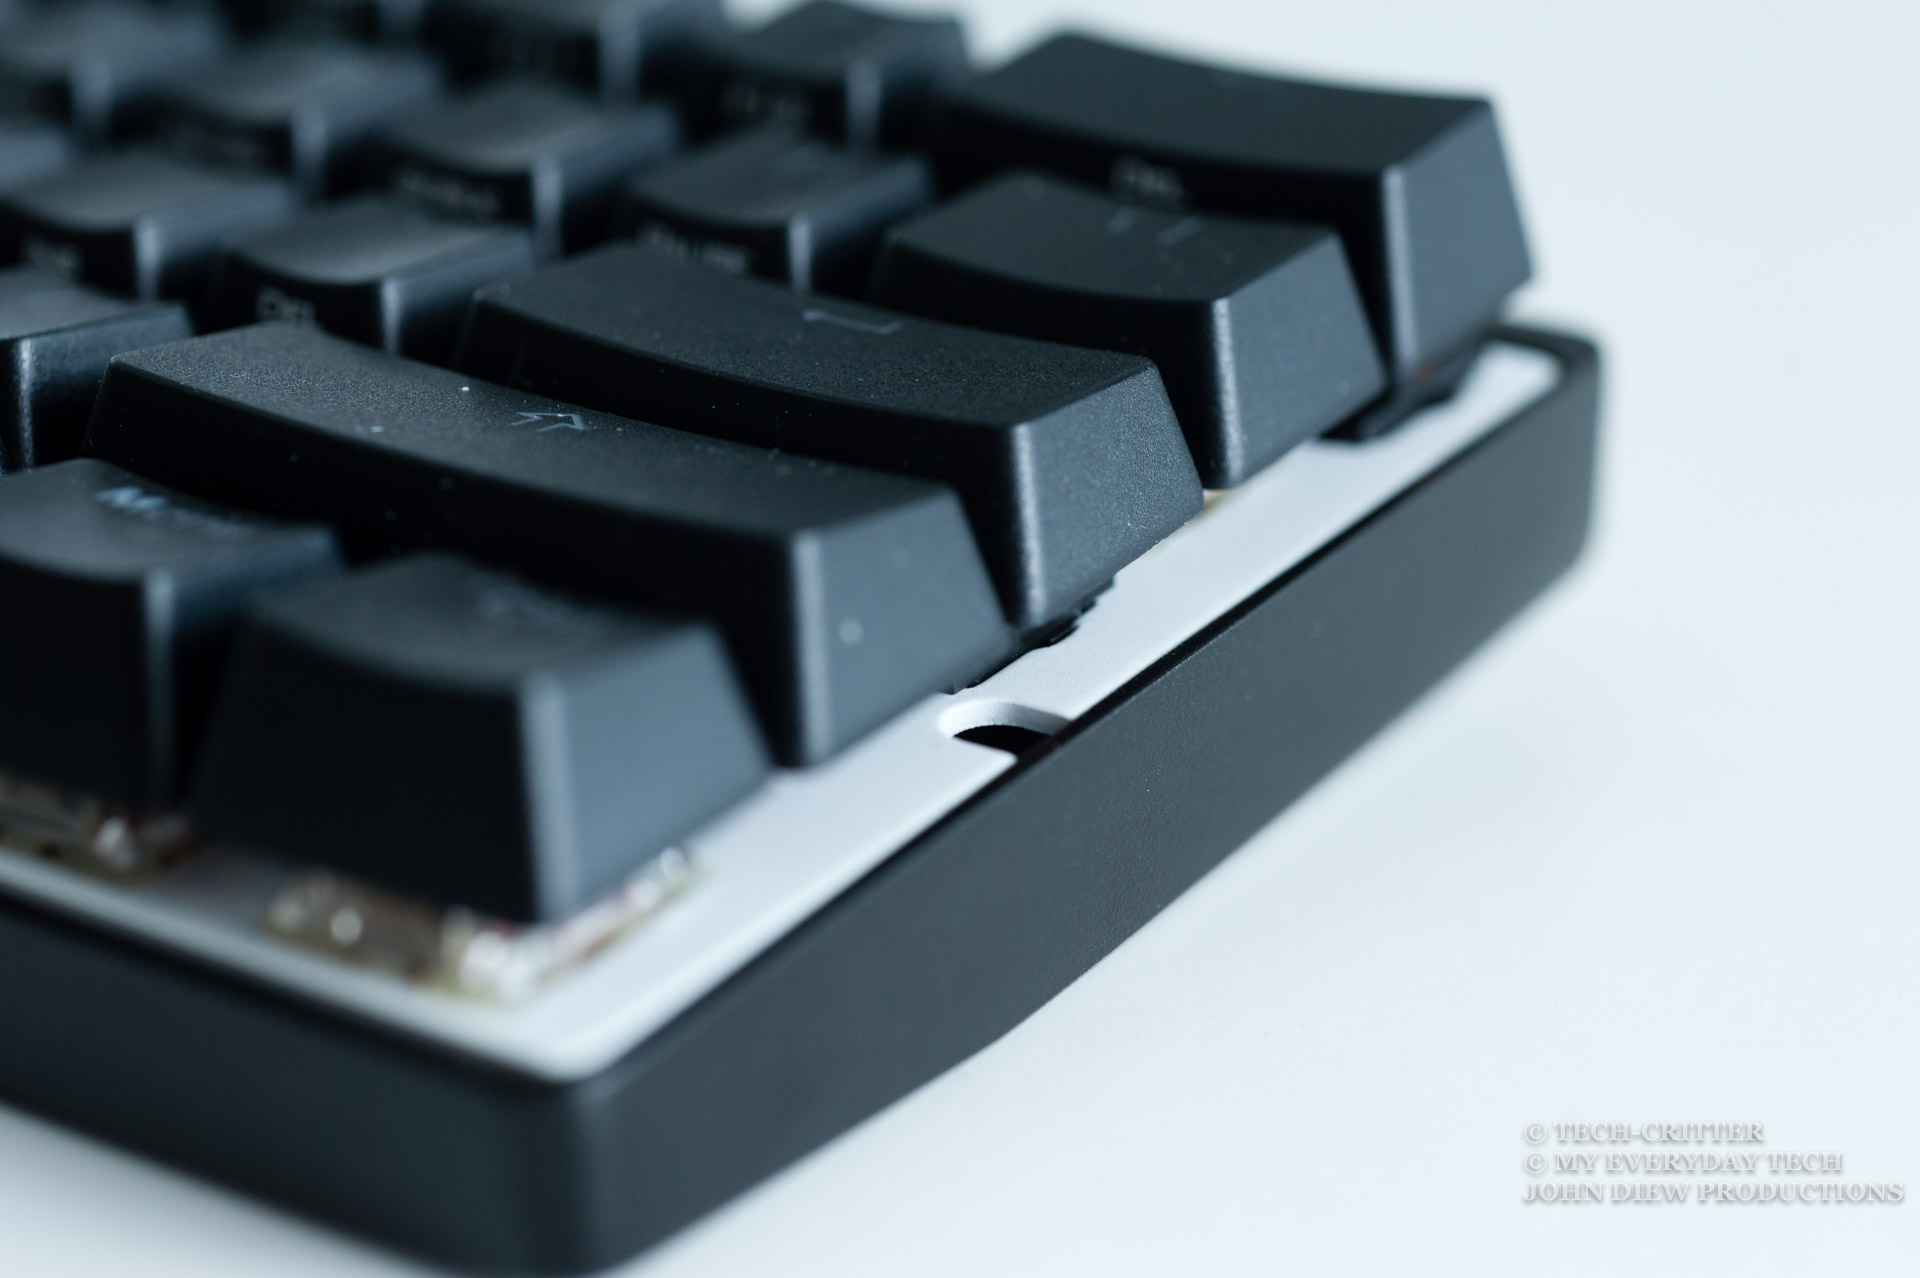
The back plate sits flush with the low profile chassis. Seriously, we’re talking about accurately fitting two pieces of metal together with some electronics circuit board sandwiched in between. On top of that, all of those in mass production quality, kudos to the folks at Vortex for such detailed and polished finishing.
Keycaps
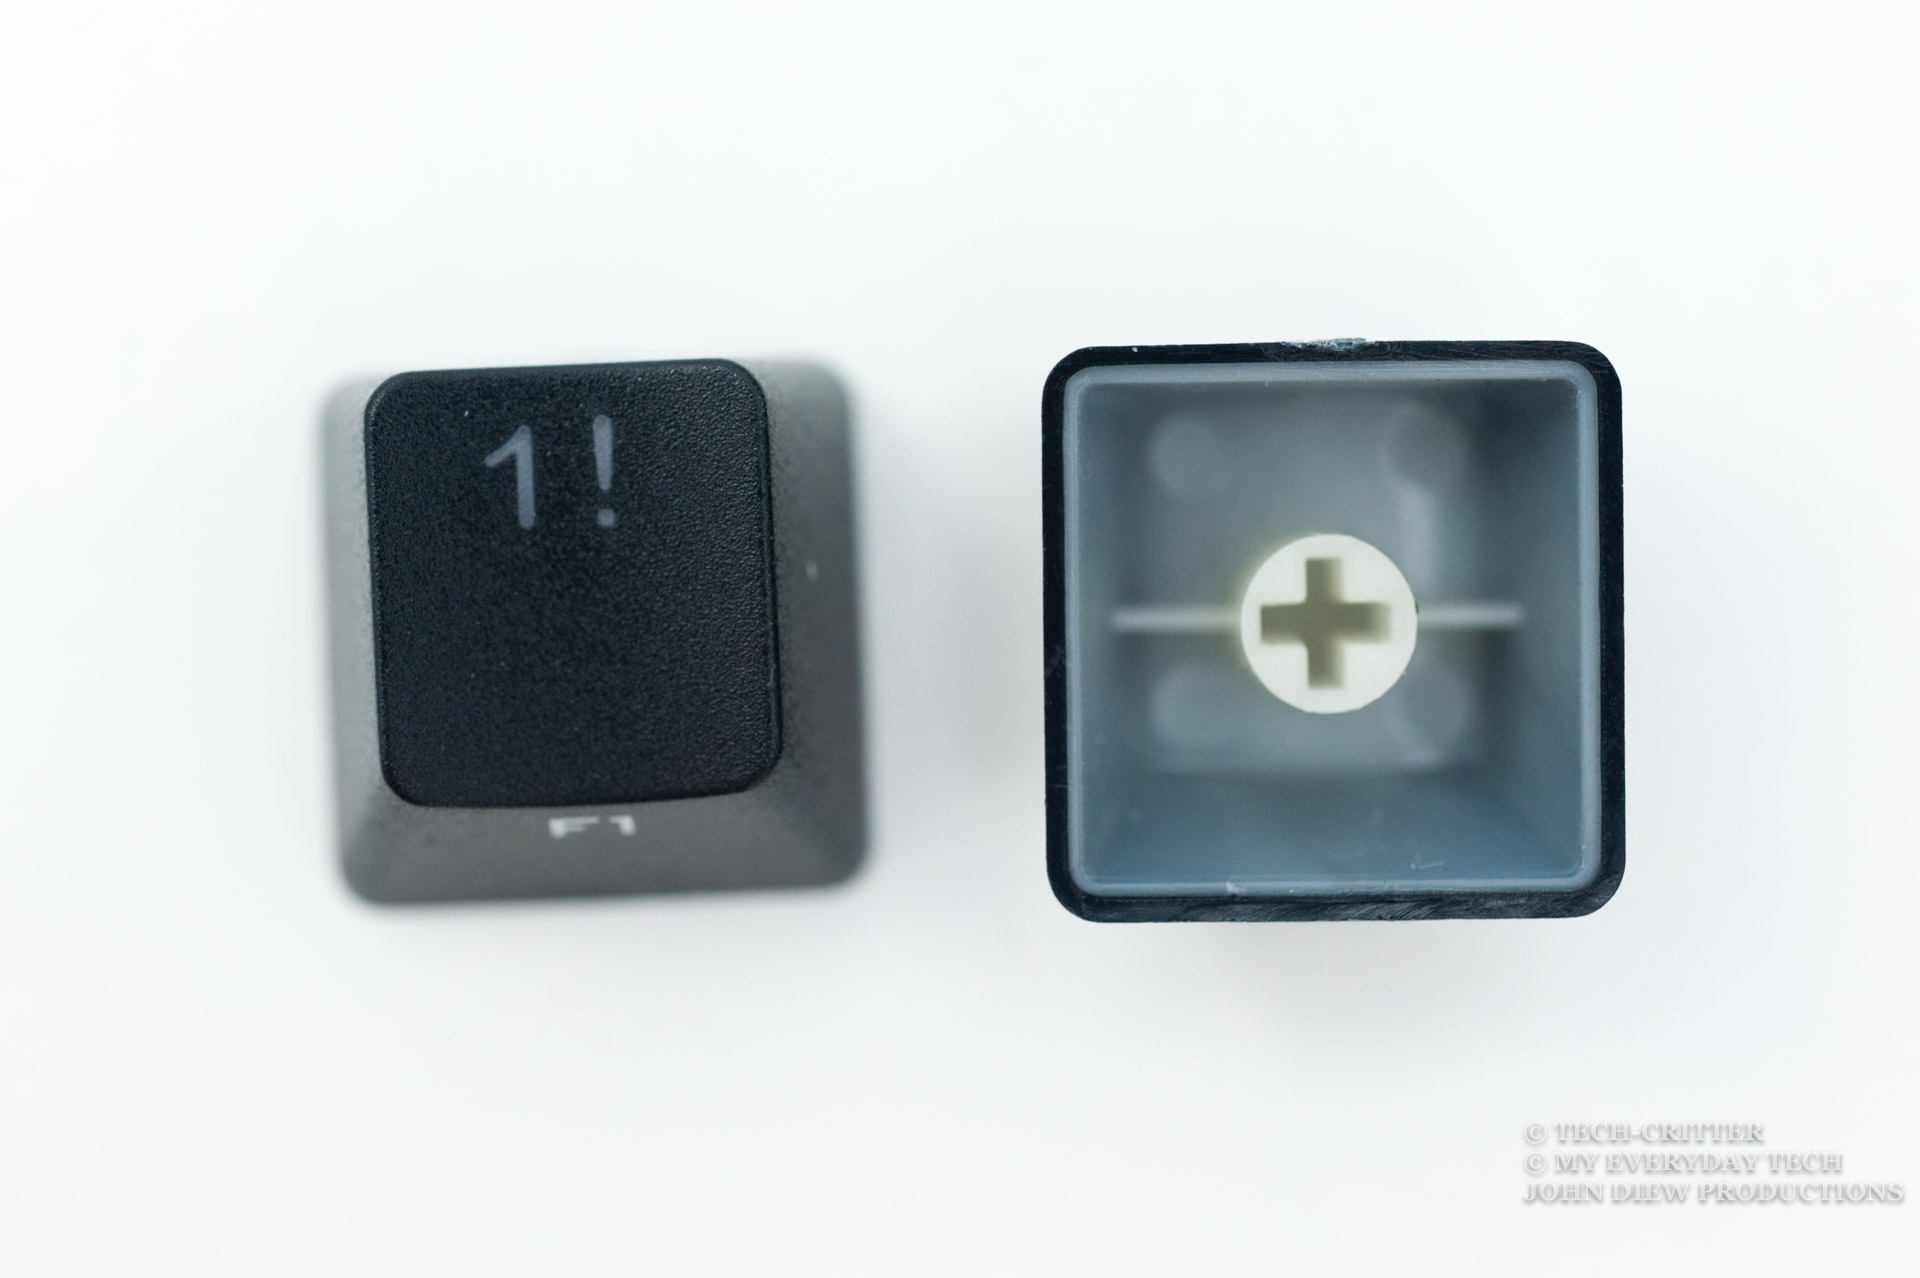
Vortex has opted for using the double shot ABS keycaps for the RGB keyboard. The keycaps are multicoated and felt better compared to other double shot ABS keycaps. However, the typing feel couldn’t stand against the much better thick PBT keycaps that come with the standard non-backlit model.
I seriously thought that Vortex could have picked the double shot PBT+POM keycaps for this, especially for how the community has been cheering on for when the POK3R was released with thick PBTs.
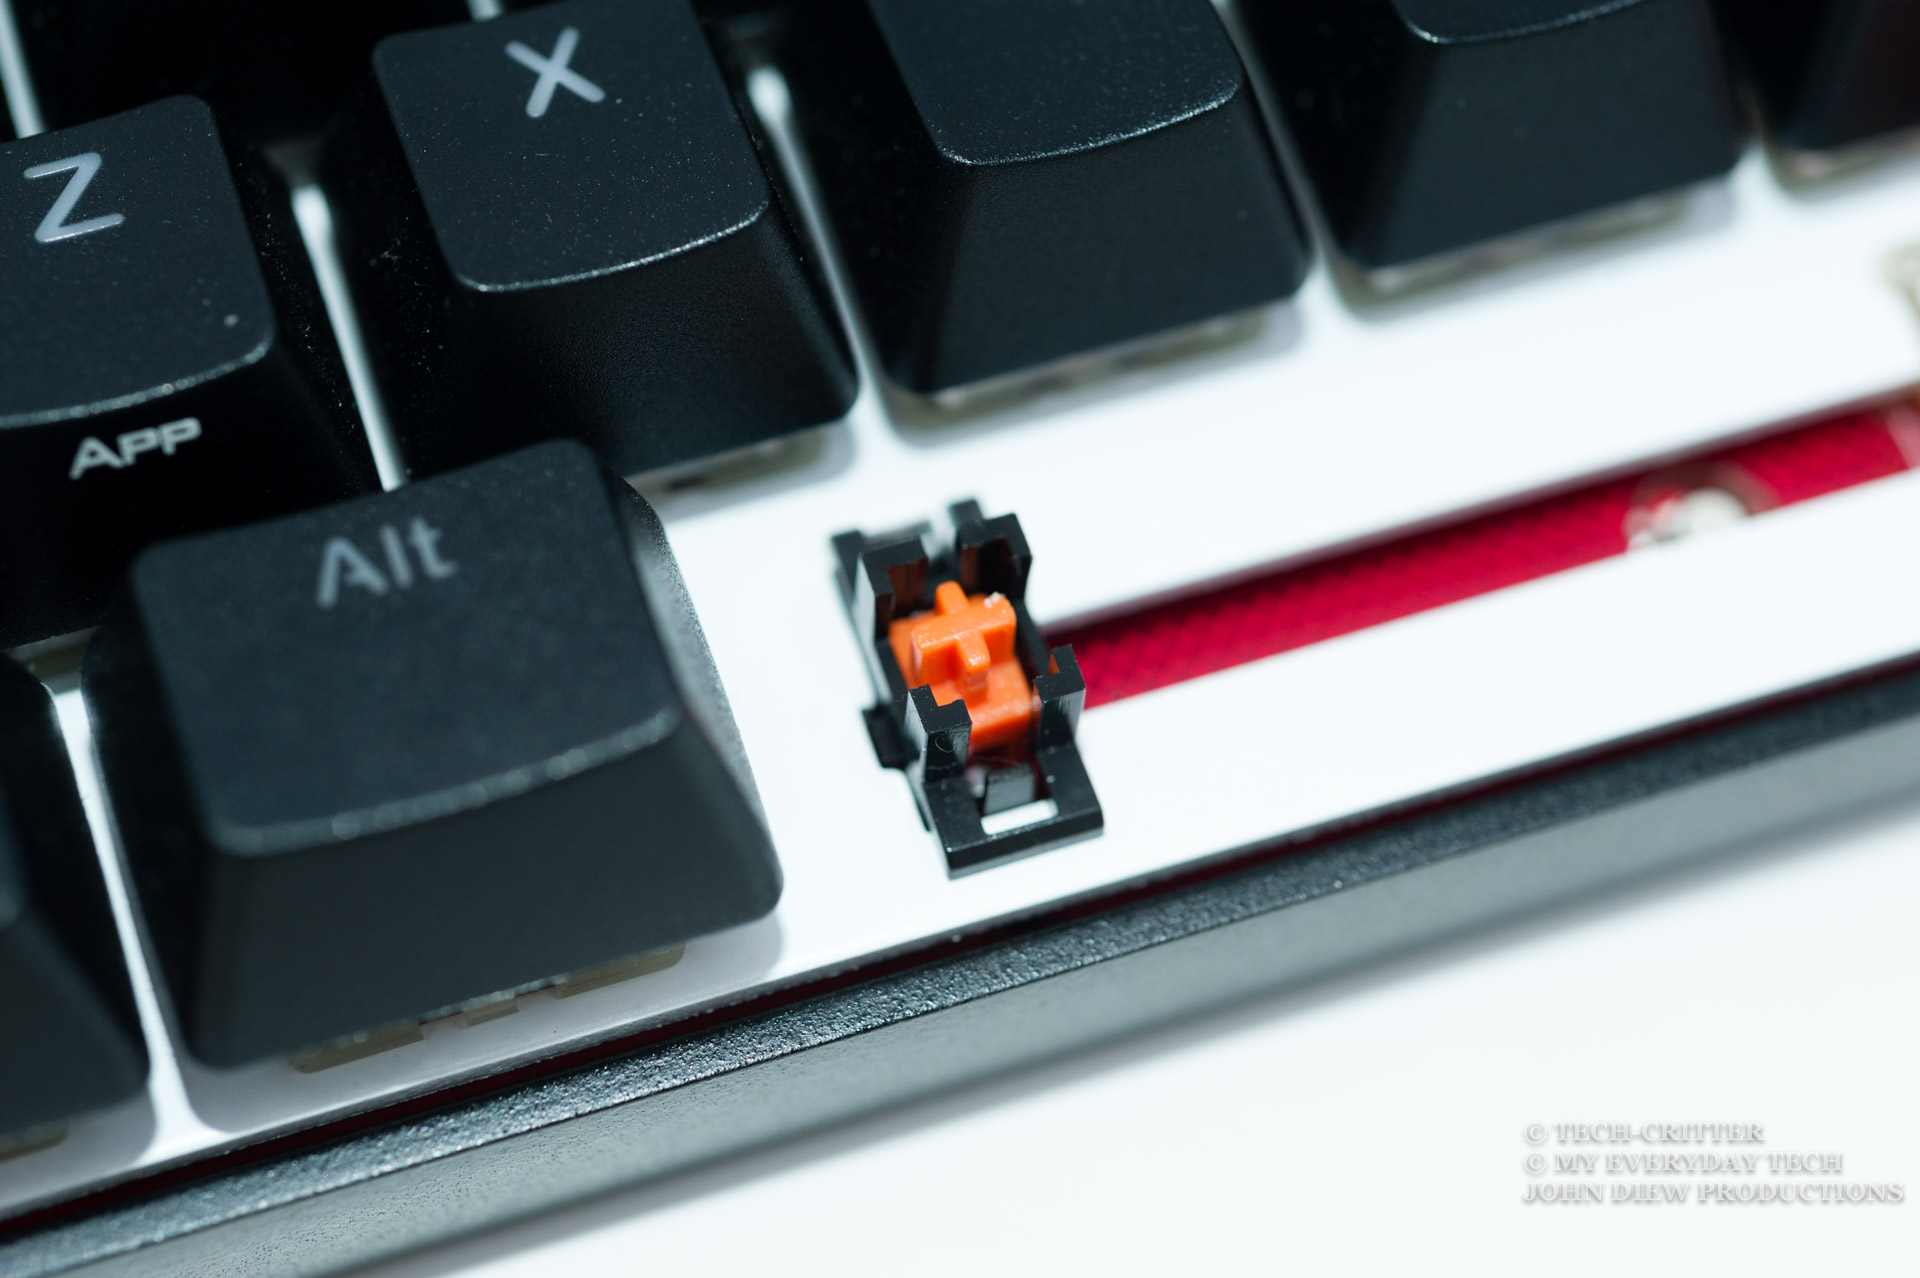
Switches & Stabilisers
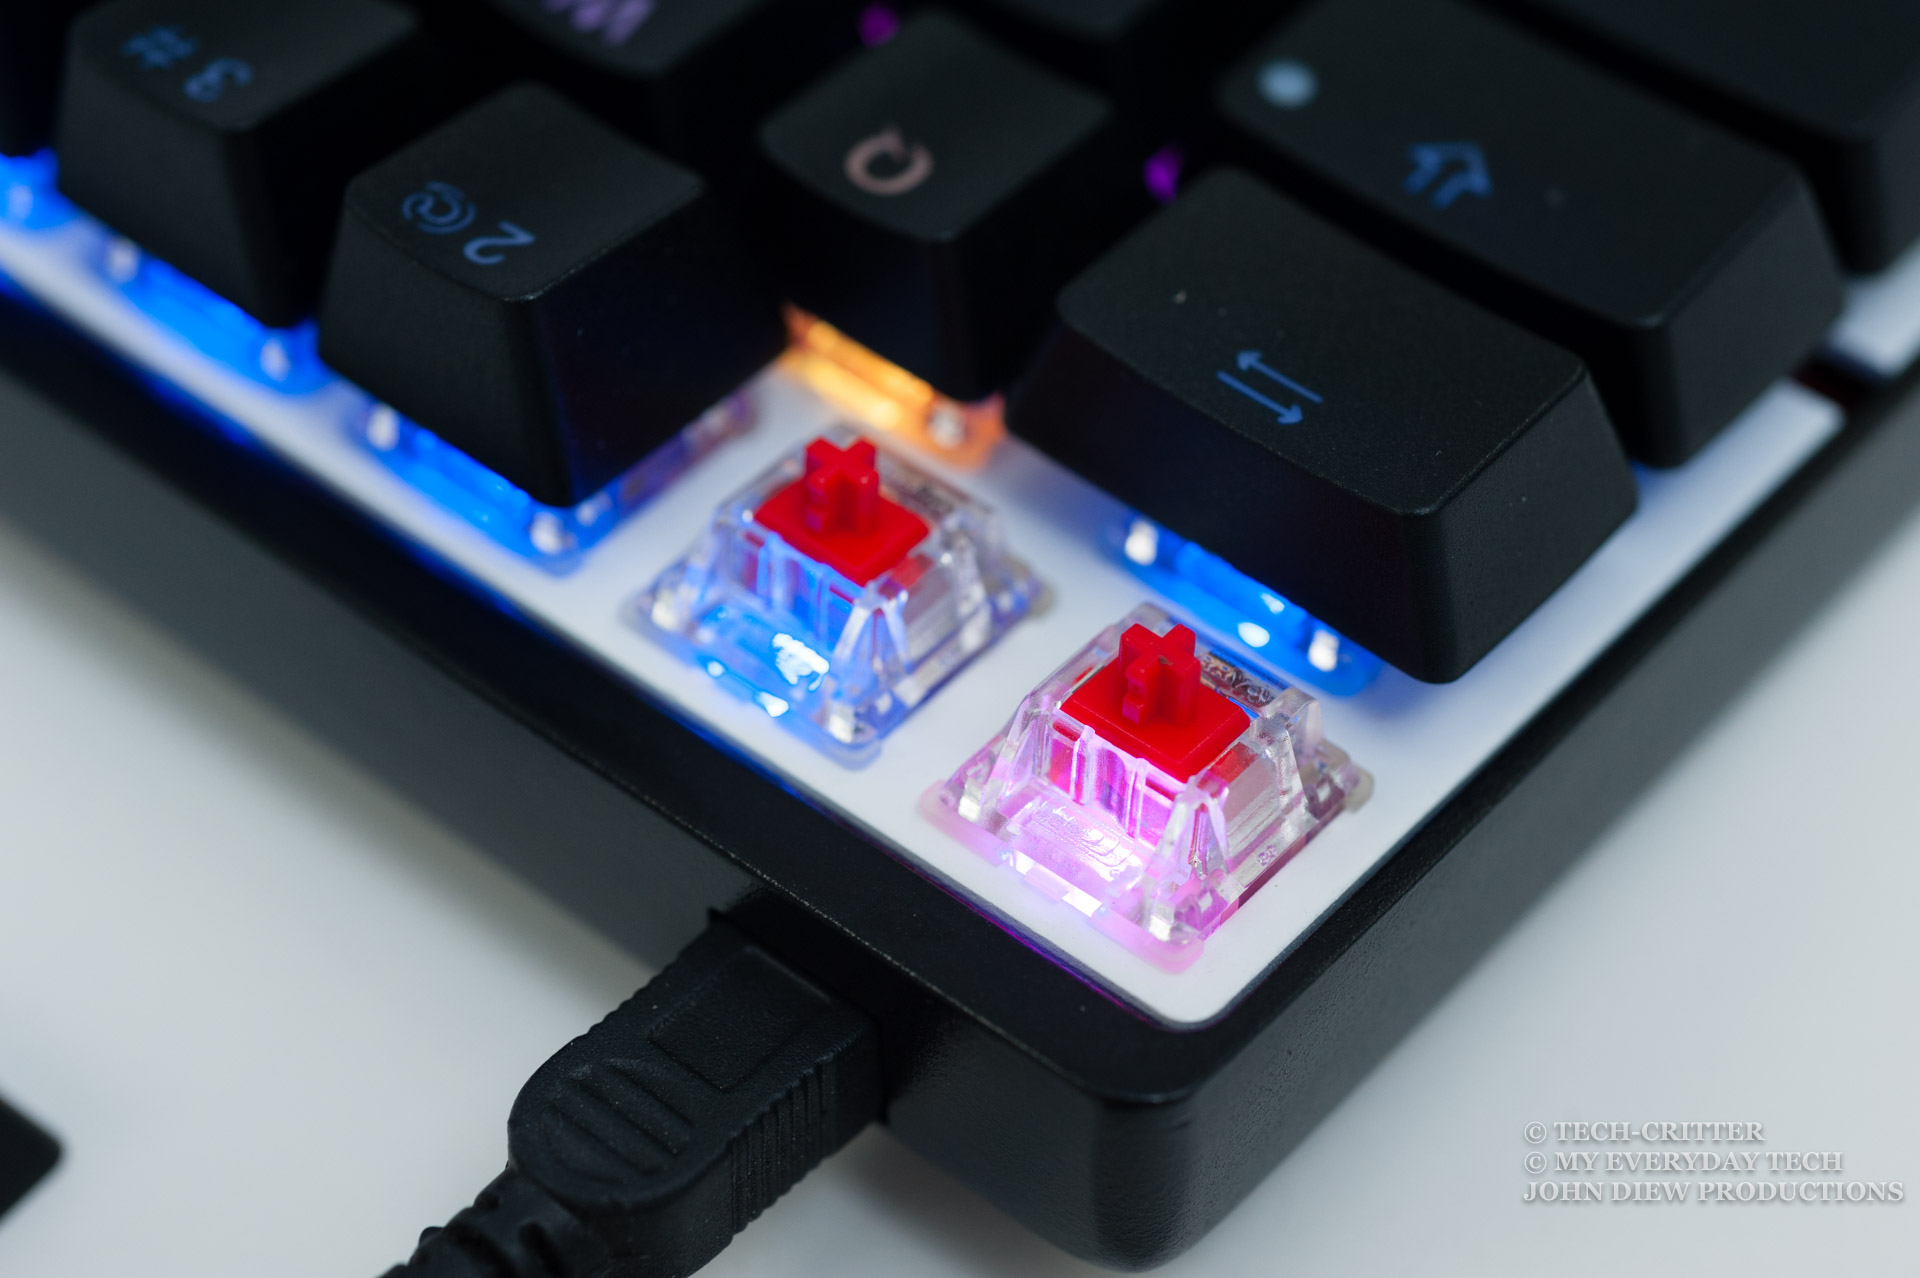
Taking off the keycaps reveals the Cherry MX RGB mechanical key switches with transparent housing.
The POK3R RGB comes with a switch choice of:
- Tactile & clicky Cherry MX RGB Blue
- Tactile Cherry MX RGB Brown
- Linear Cherry MX RGB Red (45gm actuation)
- Linear Cherry MX RGB Natural White (55gm actuation)
The keyboard I had come with the Red switches, which is my personal favourite switch for all purpose usage. Well, your switch preferences differ, though.
Cherry stabilisers are used on those long keys such as spacebar, shift, enter and backspace. They are easier for keycap removal than the wire type stabilisers.
I believe Vortex has done some tweaking at the stabilisers as it doesn’t feel as mushy as regular Cherry stabilisers.
Features
DIP Switch
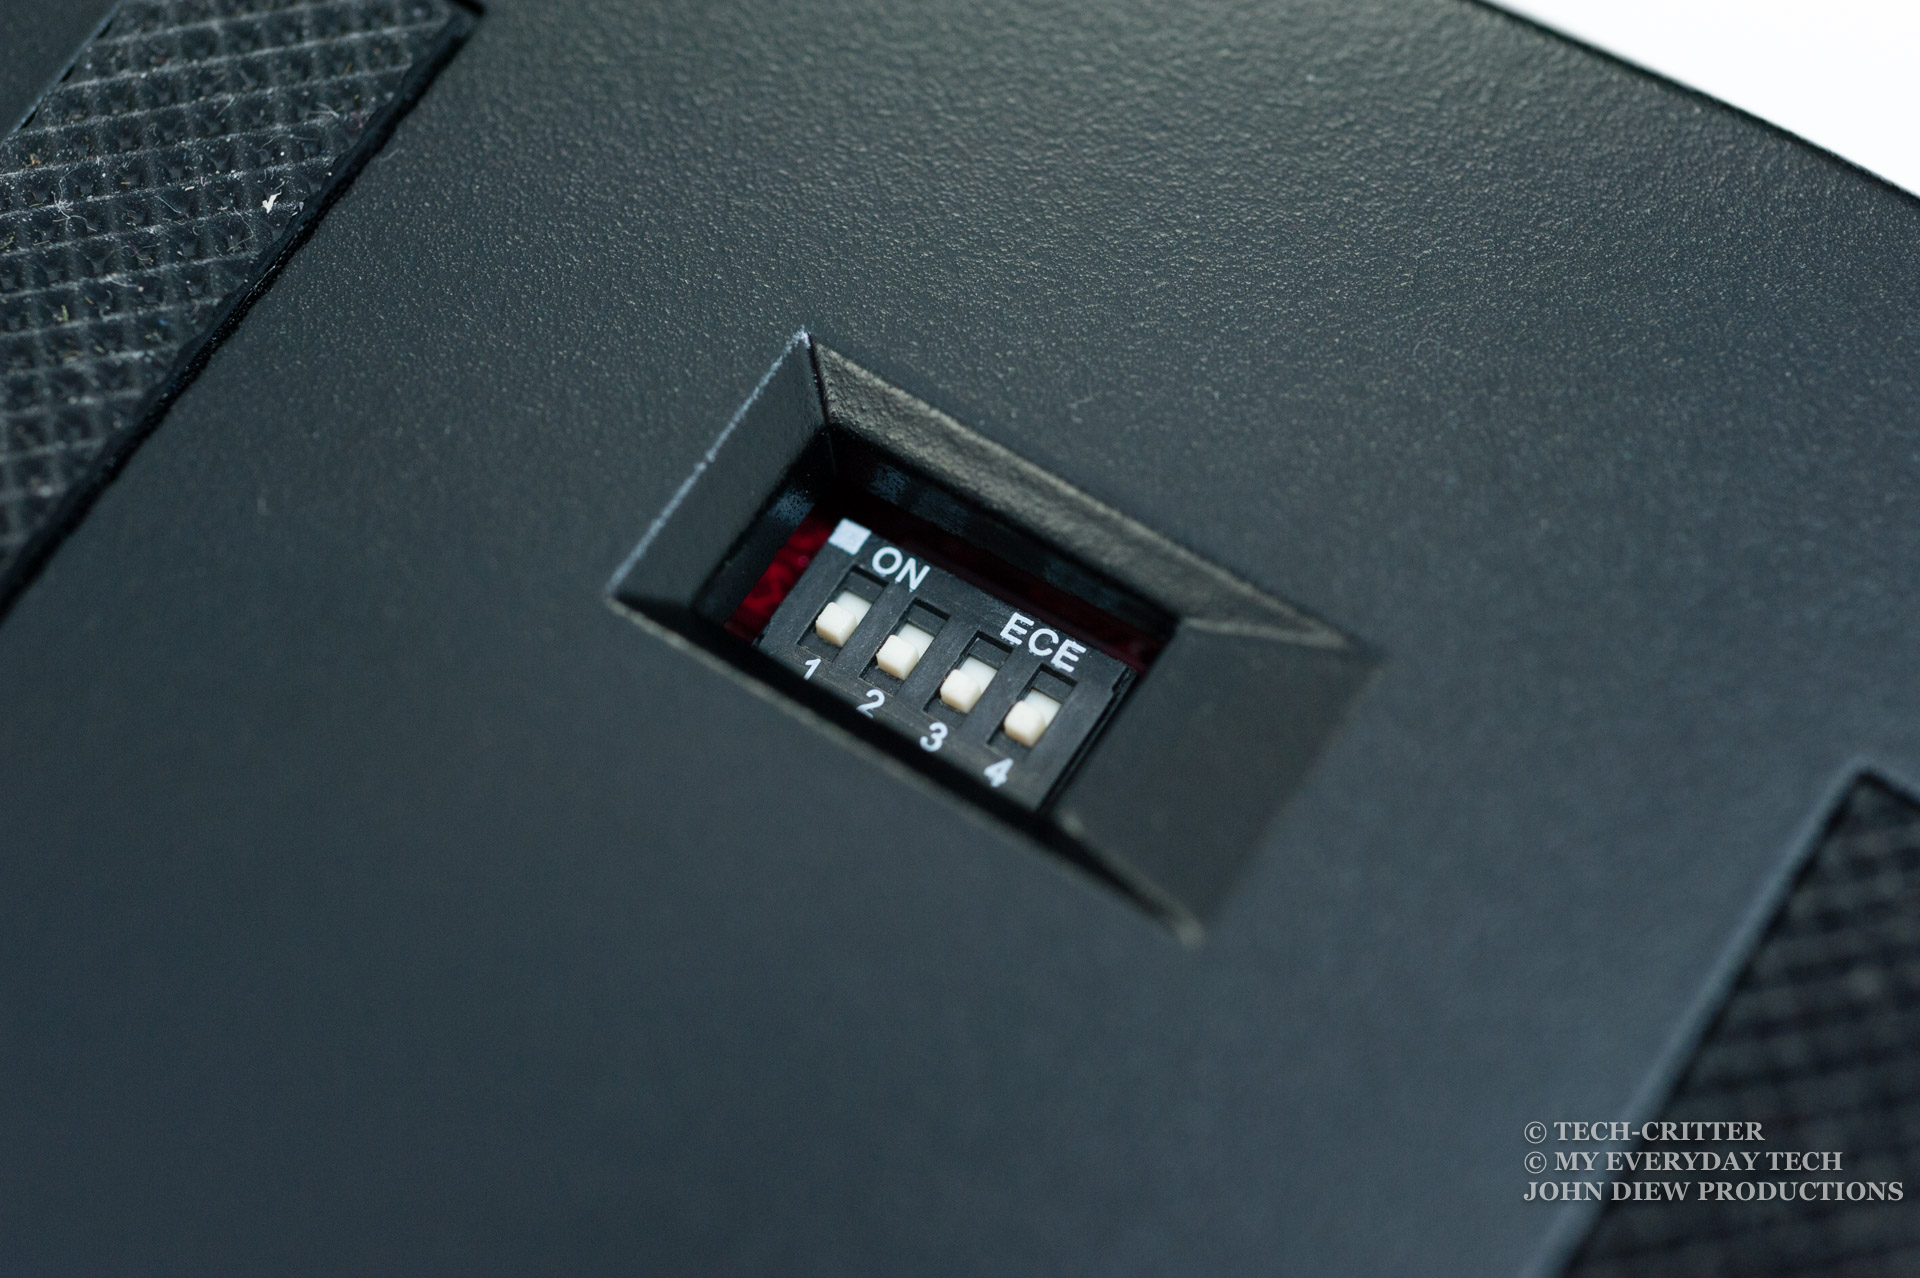
The DIP switch at the bottom of the keyboard allows the user to toggle some of the configurations such as the keyboard layout and function key location. As mentioned, you need to access to Vortex’s website for the user manual.
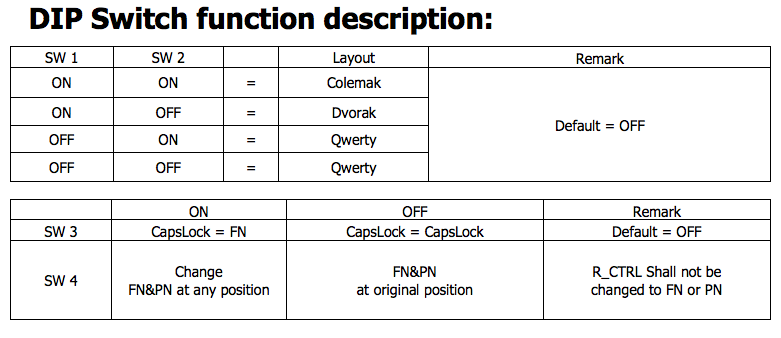
Say, you’re a Dvorak user, and by just plugging in the keyboard, the computer will recognise the layout as Dvorak without the need of configuring it in the OS settings.
Key Combos
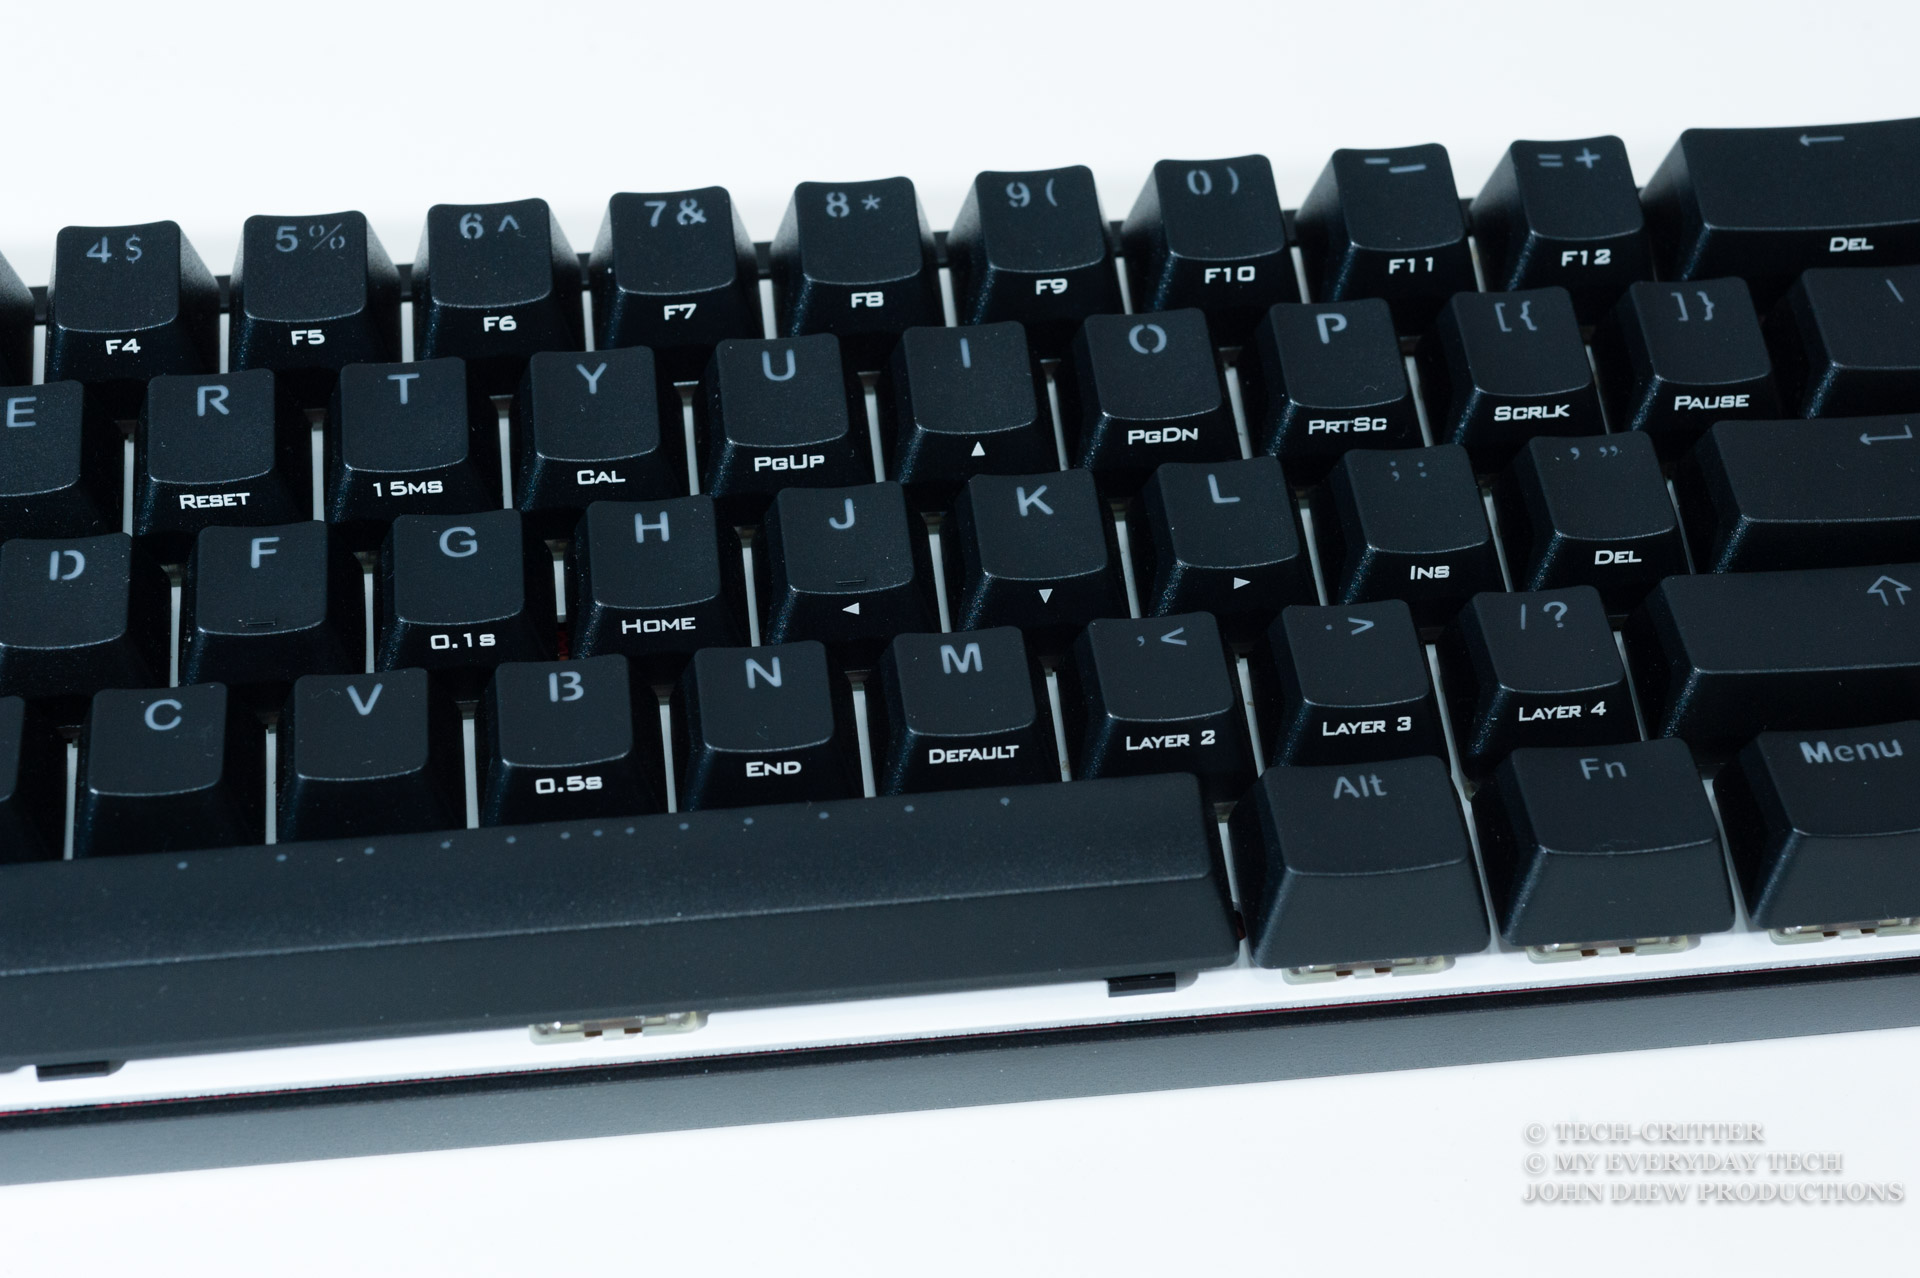
You still have access to all the missing key functions with the FN layer even though the keys have been reduced. Holding the “FN” key will activate the FN layer while holding the “Menu” key will activate the PN layer. It is indeed troublesome for beginners, but once you get used to the layout, you’re going to fly through the combos without having to look at the side-printed labels.
The keyboard also has native multimedia control built-in, however, they are not labelled on the keycaps. Same applies to the LED functions. I understand the PN combination will overlap the FN combinations but Vortex could have labeled all the FN functions instead of leaving them out.

The missing FN layer labels.
Lighting customisation functions fall under the PN layer.
I wonder why Vortex print the text “Menu” instead of “PN” on the keycap.
Another thing I hate is the Vortex’s decision to move POK3R’s arrow cluster from WASD to IJKL which is extremely awkward to use because you need to press down the FN key to use the cluster.
Programmable Layers
Vortex introduced 2-layer programmability function with the second generation POKER keyboard. For the third generation POKER, they increase the programmable layers to 3 layers.
Instead of holding the PN key to access to the additional layers, the new keyboard allows you to toggle between different layers with the use of FN key.
It is really useful that we can program a hot key on-the-fly without the need of any software installed on your computer.
While usually a hotkey’s command is triggered with a single actuation and ends at the end of the command, but one thing I find it weird is that we need to keep the hotkey depressed in order to execute the command and it won’t stop until we lift our finger.
Here’s a video to showcase how you can configure the layers.
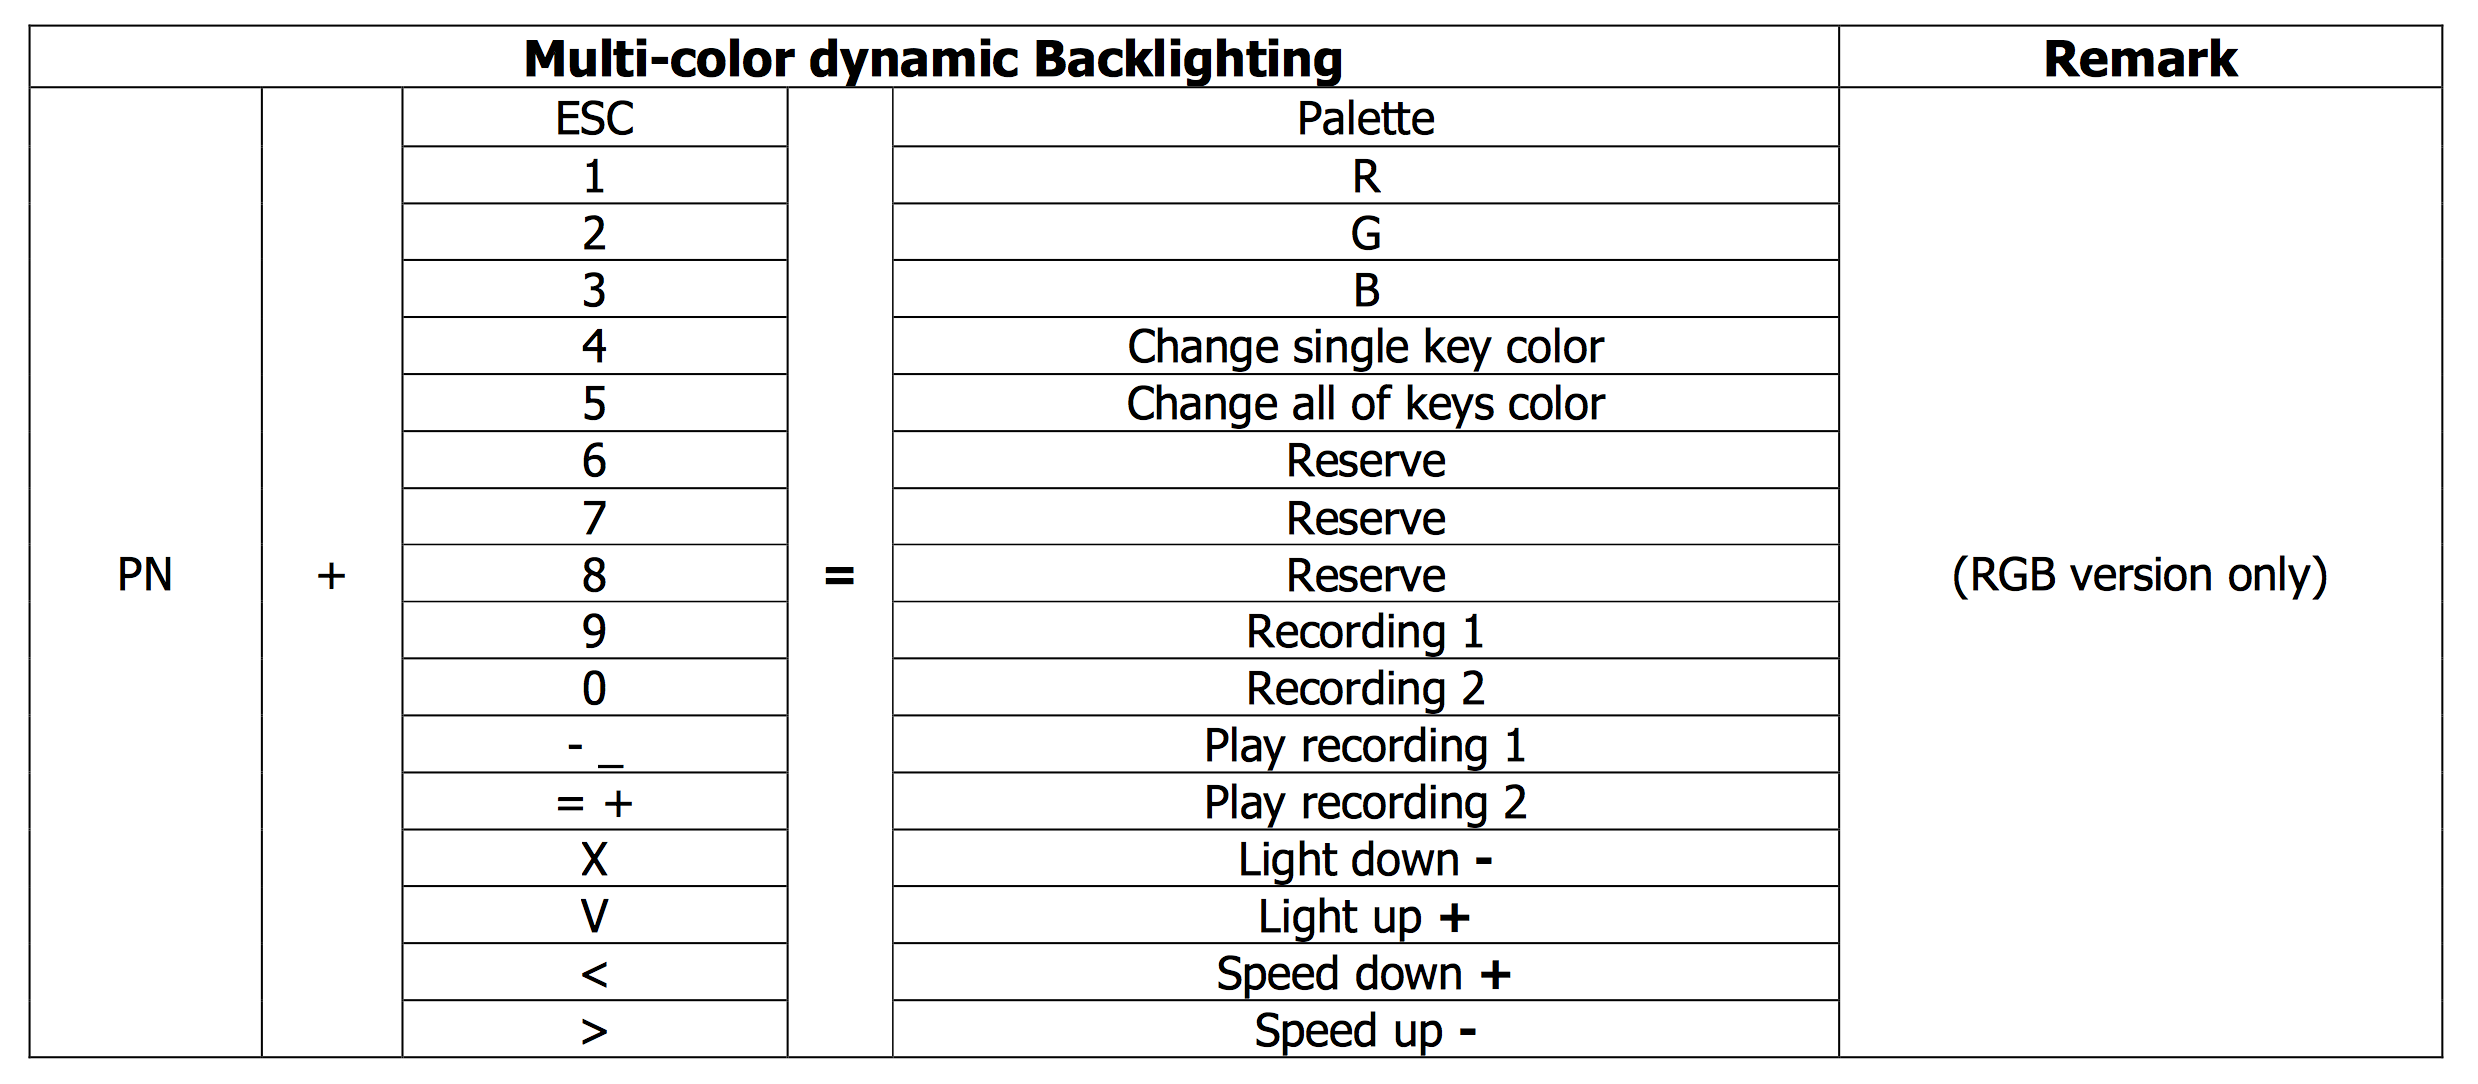
LED Configuration
If you fancy for those extra blings on your peripherals, the POK3R RGB will not disappoint you with the extra bright LEDs. The keyboard utilises the RGB variant of Cherry MX switches that has transparent housing for maximum light dispersion.
It comes with multiple onboard presets that includes full keyboard backlight as well as per-key reaction type of lighting effect. The icing on the cake is the ability to support your own custom lighting pattern.
Here’s a video with in-depth explanation and demo for the LED backlighting.
Verdict
I’ll be honest with you, 60% keyboards has a very niche demand in the market. Only those mechanical keyboard enthusiasts would pay attention to these keyboards. Sometimes, even those 87-key (tenkeyless) are having a difficult time to sell due to the lack of num pad. Hence you don’t see a lot of brands releasing 60% keyboards.
This is for those who are looking for a keyboard with a small footprint that saves their precious desktop space without sacrificing any of the full-sized keyboard functions. Although the keyboard sells at RM599, but consider that we’re getting top-notch build quality especially the cast aluminium chassis, we think it is fair. On top of that, you’re getting 3 programmable hardware layers as well as customisable RGB backlighting. We had boat-loads of fun exploring the capabilities and potential of this keyboard and certainly, you would find it interesting as well.